Survey Validation Rules with Exceptions
For some question types there are already various validation settings in the question. For example, for the Amount question type, where you can set the boundaries such as Upper Limit and Lower Limit. Beside these possibilities there are extended validation possibilities with the Exception function.
Navigation for User - Survey
1. Question Around with Surveys 1.1. Creating a Survey 1.2. Design for Surveys 2. Design for Category Checklist 2.1. Question Types 2.2. Further options for questions 2.3. Branching 2.4. Attachments for Questions 2.5. Dynamically Display Answer Options 2.6. Actions and Tabs 3. Design for category Products 3.1. Design for Survey Category Products 3.2. Product Determination 4. Design for category Registered Products 5. Design for Competitors 6. Design for Competitor Products 7. Design for category Satisfaction 8. Validation Rules with Exceptions 9. Language Settings 10. Score 11. Follow Up Actions 11.1. Follow-up Tasks and Follow-up Tickets 11.2. Follow-Up Sales Quotes and Sales Orders 12. Question Bank 13. Usage of Surveys 14. Reporting on Surveys 14.1. Tab Results 14.2. Reports
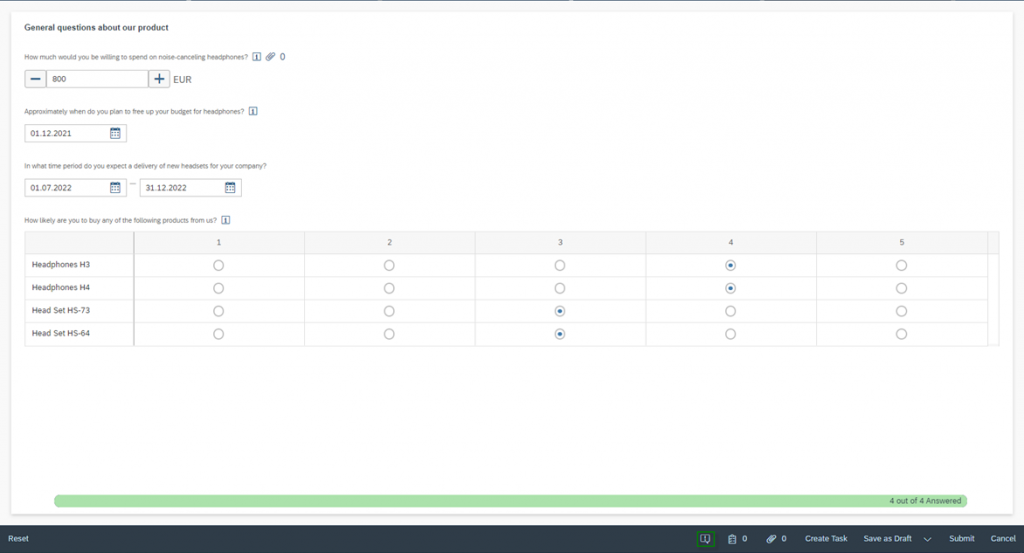
When the survey is filled out, clicking on the Exception Icon ![]() – bottom right – will validate it.
– bottom right – will validate it.
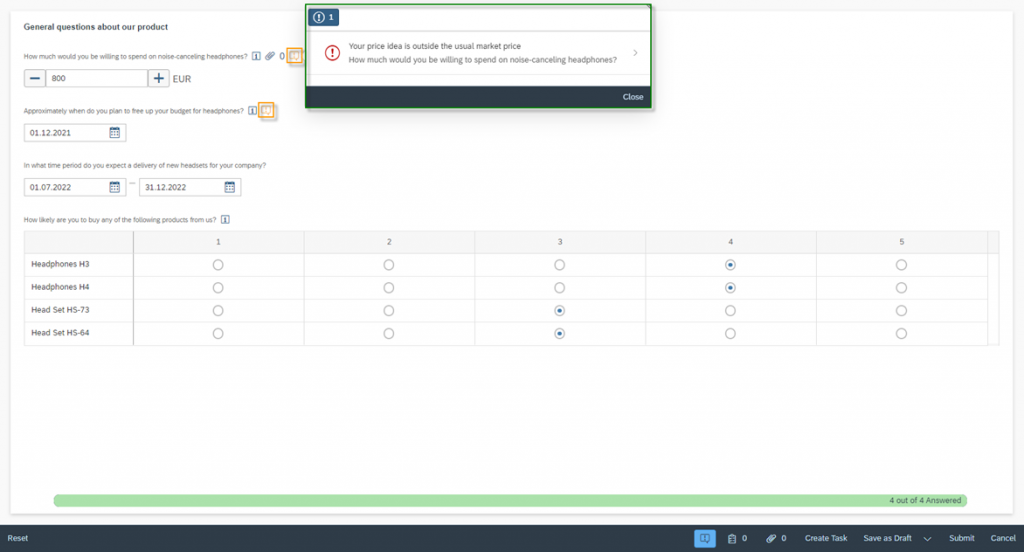
You will find a Warning Icon ![]() for all questions that have been negatively checked by the validation rules. Then, when you click on the icon, the respondent gets a popup with a validation message.
for all questions that have been negatively checked by the validation rules. Then, when you click on the icon, the respondent gets a popup with a validation message.
By clicking the Exception Icon ![]() again, the validation with the warning icons will disappear. When you correct the values later you can restart the validation then again. The warning message will also disappear while editing the given answer to a value that matches the boundaries.
again, the validation with the warning icons will disappear. When you correct the values later you can restart the validation then again. The warning message will also disappear while editing the given answer to a value that matches the boundaries.
To create such validations rules, go to your Survey and navigate to the Exceptions tab. You can either create new exceptions by clicking the Add button, edit existing ones by clicking the Edit Icon ![]() or delete existing ones by clicking the Trash Icon
or delete existing ones by clicking the Trash Icon ![]() .
.
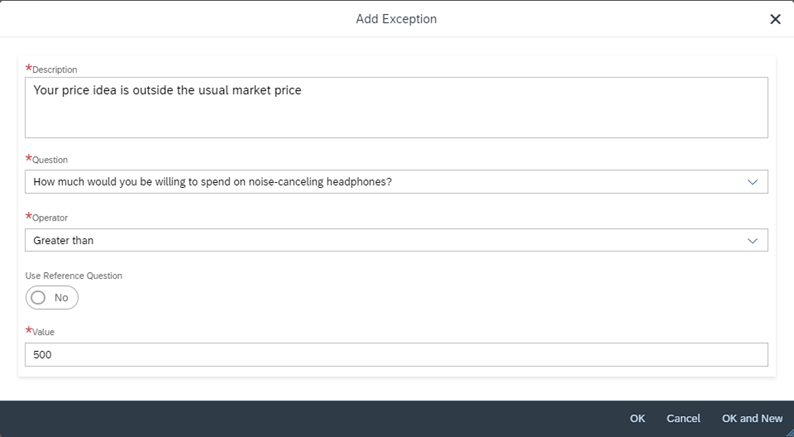
When you create a new exception, the first step is to enter the Description. This will later be the message displayed to respondents during validation. In the second step, you select the Question to which the validation should apply. Exception works for the following Question Types: Amount, Date, Multiple Choice and Quantity. The next step is to select the Operator, i.e. how to validate. All common operators like equal, less than, between, greater than, not equal, etc. are available. In the fifth and last step you enter the Value that serves as the check digit. In the following figure an example is shown, where it is checked if the value entered in the Amount question is greater than 500.
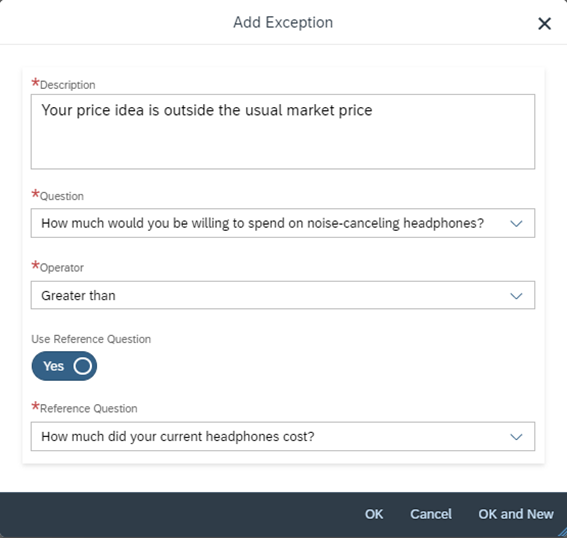
You can also select an answer from another question as the check digit. To do this, enable the indicator Use Reference Question. As you can see in the following figure, you can no longer enter a value, but must select a Reference Question. As a prerequisite, this question must be of the same type as the validation question.
The Customer Experience team at Camelot ITLab deals with exciting and challenging CRM related topics every day and serves a large portfolio of different customers from a wide range of industries. Trust in this collaboration and feel free to contact us at tlil@camelot-itlab.com.
Was this article helpful?
If you like our content we would highly appreciate your review on Trustpilot
#SAP C4C #SAP Cloud 4 Customer #Cloud 4 Customer #Cloud for Customer #SAP Sales Cloud #Sales Cloud #Survey #Validation #Validation Rule #Exception #Reference Question #Operator #Warning

