OData API
Connect Mircosoft Power BI® with SAP Sales Cloud
You can also use the OData API to create analyses with non-SAP programs. A very common analysis tool today is Power BI from Microsoft®. In the following steps the Opportunity Collection is used to explain how to establish the connection between the OData SAP Sales Cloud API with Power BI.
Navigation for OData API
1. Test SAP Sales Cloud OData API with Postman 1.1. OData 1.2. Postman 2. GET Requests 2.1. SAP Sales Cloud Object Collections 2.2 Metadata 2.2.1. Principle 2.2.2. Attributes 2.2.3. SAP-Attributes 2.3. Work with Parameters 2.3.1. Filter 2.3.2. Work with Dates and Datetimes 2.3.3. Orderby 2.3.4. Top 2.3.5. Skip 2.3.6. Format 2.3.7. Select 2.3.8. Count 2.3.9. Inlinecount 2.3.10. Expand 2.4. Examples of GET Requests 2.5. Build OData Queries for Reports 3. X-CSRF-Token 4. POST Request for creating 4.1. Single POST Request 4.2. Create multiple entries with $batch 5. PATCH Request for updating 5.1. Single PATCH Request 5.2. Change multiple entries with $batch 6. DELETE Requests 7. OData Monitor 8. OData Service Explorer 9. Enable customized fields for the API interface 10. Connect Mircosoft Power BI® with SAP Sales Cloud API 11. Deep Links for URL to SAP Sales Cloud Objects
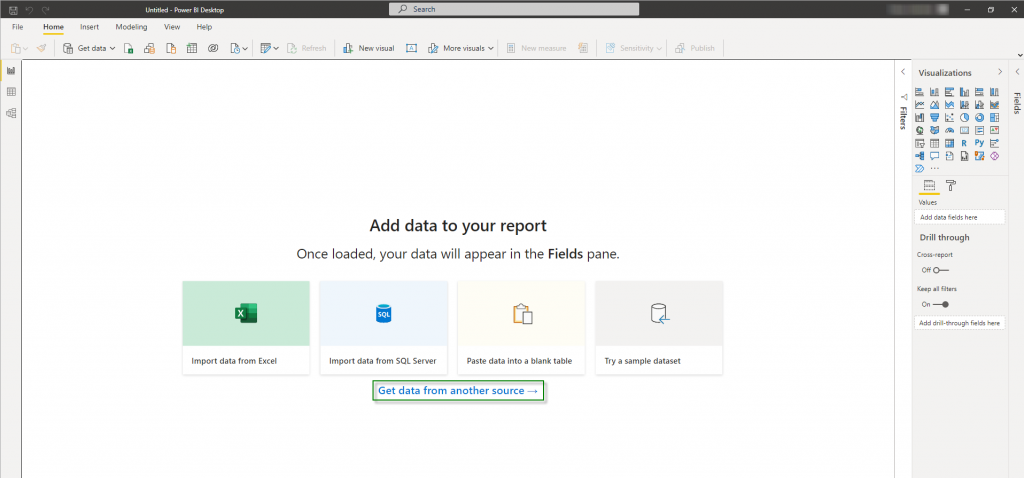
In the Start Screen of Power BI click on Get data from another source ->.
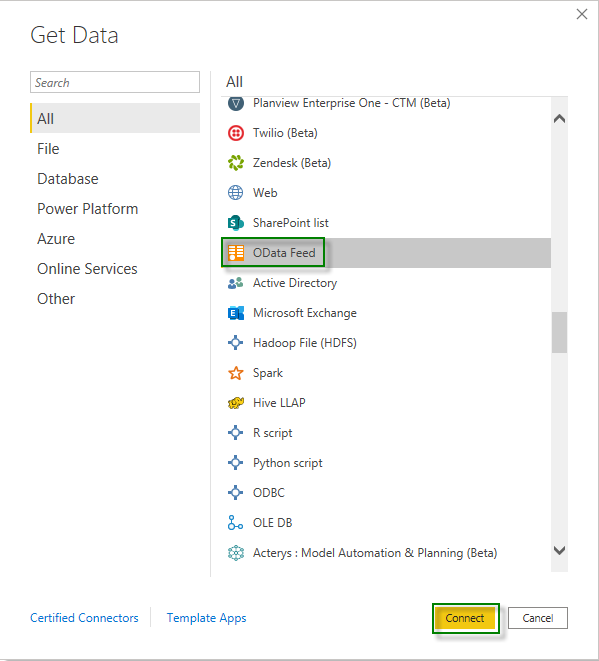
You will find a large number of different connectors in Power BI. Select the connector OData Feed to get data from SAP Sales Cloud. Click next on Connect.
In the next window of the OData feed, specify the URL of your system and the collection from which you want to get the data. In the example shown, the collection of opportunities is selected.
System-URL:
https://my######.crm.ondemand.com/sap/c4c/odata/v1/c4codataapi/
+
Collection:
OpportunityCollection/
=
URL:
https://my######.crm.ondemand.com/sap/c4c/odata/v1/c4codataapi/OpportunityCollection/
Please make sure that you don’t use the $format parameter, since this will lead to errors. The application will define it automatically.
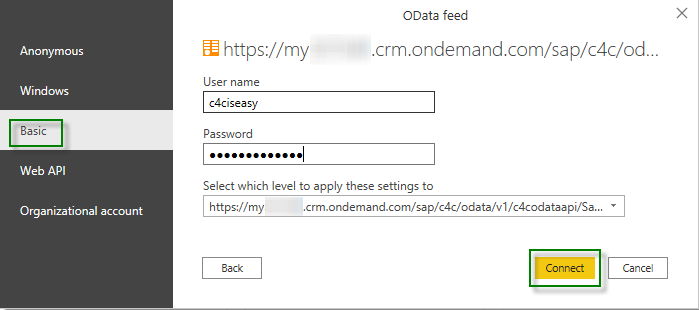
In the next step you need to select how you want to authenticate. The simplest is the basic method. So click on Basic and enter your User Name – which you also use to log in to SAP Sales Cloud – and also your Password. Next you can select the level to which the authentication applies to. Confirm with clicking on the Connect button.
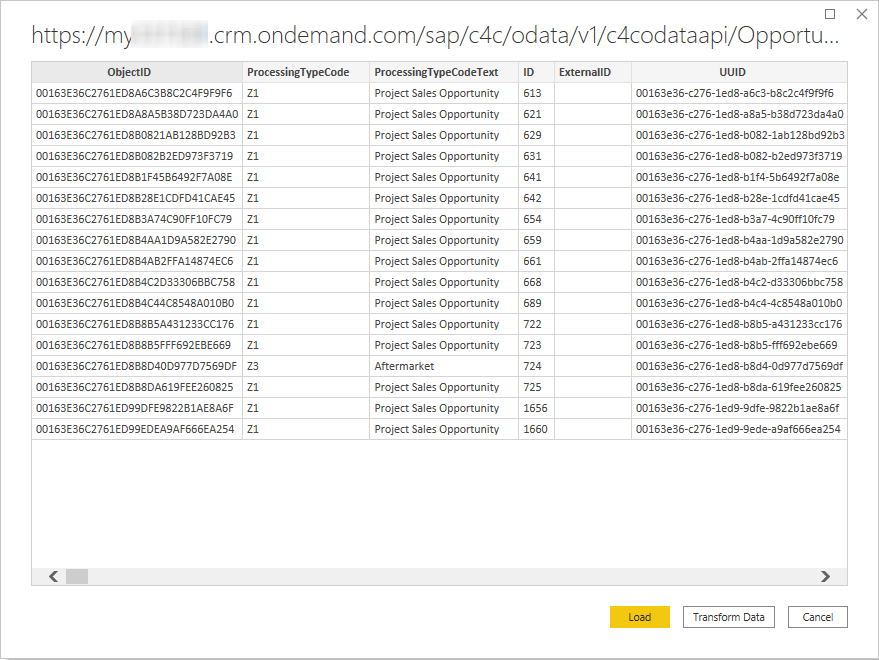
From now on you are ready to go. As you can see in the following figure is that Power BI already transferred the output into a table format. When you now click on Load Button you can start designing your Dashboard in Power BI.
For most Business Objects in SAP Sales Cloud you have Subordinate Entity Types – e.g. Address Information for Accounts. For better understanding of these Relationships please refer to Chapter OData. However, in Microsoft Power BI® this leads to so called Nested Tables. If you have to work with Nested Tables you have a 1:n Relationship. In the following this will explained on the Example of AccountAttachments.
If you use the Source OData.Feed in Microsoft Power BI® and you use the following Get-Request:
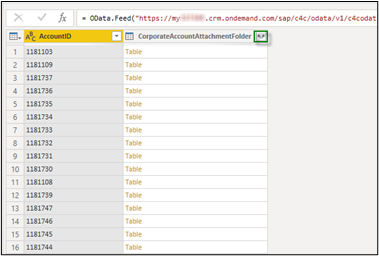
https://my######.crm.ondemand.com/sap/c4c/odata/v1/c4codataapi/CorporateAccountCollection/?$select=AccountID,CorporateAccountAttachmentFolder
As you can see, you will find Tables within your Data-Table. To work with this data within this Table simply click on the Expand Icon ![]() .
.
The Customer Experience team at Camelot ITLab deals with exciting and challenging CRM related topics every day and serves a large portfolio of different customers from a wide range of industries. Trust in this collaboration and feel free to contact us at tlil@camelot-itlab.com.
Was this article helpful?
If you like our content we would highly appreciate your review on Trustpilot
#SAP C4C #SAP Cloud 4 Customer #Cloud 4 Customer #Cloud for Customer #SAP Sales Cloud #Sales Cloud #OData #API #Request #Dashboard #KPI #Microsoft #Power BI

