Search
Close this search box.

Routes

Routes

Plan and optimise your process to create routes for your customers to visit. This article explains how it works

It’s fair to say that many field sales reps feel like truck drivers. Every day they are on the road visiting as many customers as possible. There are also many companies that measure their employees by the number of customers they visit. For many, scheduling visits with an optimal route is therefore a headache. You copy the address data from a customer excel list – which may not be up to date -, enter it into Google Maps and try to figure out how the next day can look like. In the process, boundary conditions such as visit times, discussed meeting times over the phone, etc. are often overlooked.

With SAP Sales Cloud Route Planning, you can optimize these processes for your sales staff. Since all data is managed in one system, a standardized interface to Google Maps exists and the mobile application for your mobile devices is given, all employees can optimally execute their visits.

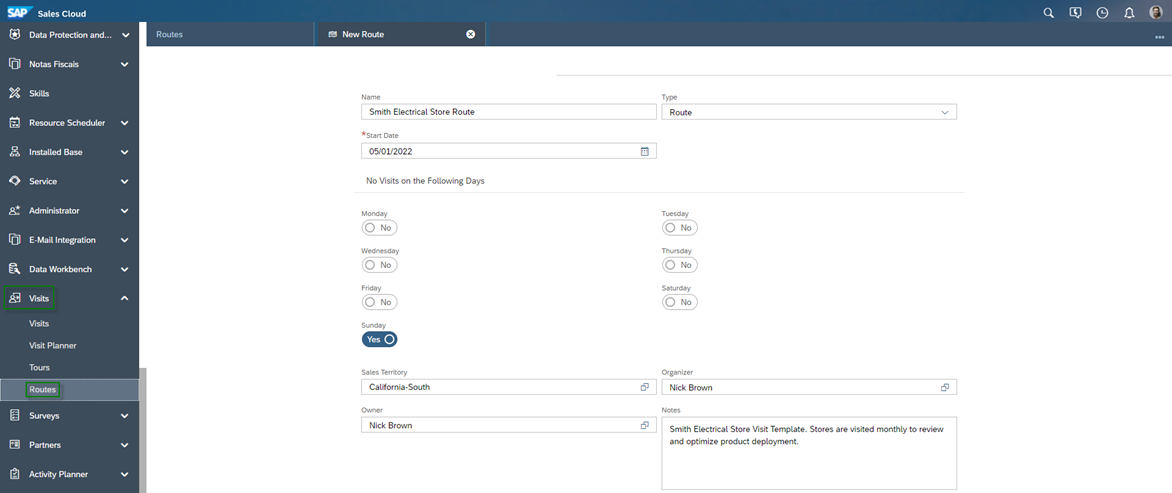
Creation of a New Route

To create a new route, click the Create Icon  in the Routes Work Center View of the Visits Work Center. Enter the following data in the creation form:

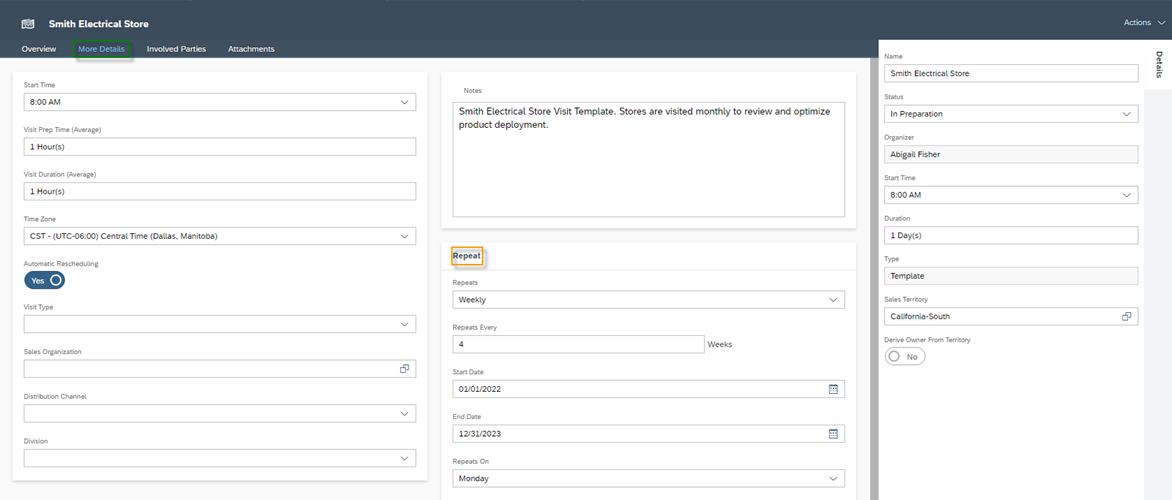
Name                                    Assign a name for your route

Type                                      Select the application type. You can choose between the entries Route and Template. The Route entry is a route to be executed, while the Template is to be used as a template for future routes. More about this later

Start Date                            Specify the date on which the route should be started. A route can also go over several days, whereby you select only the start date here

No Visit on the Following Days

Enable the days when no visits should be scheduled for this route. The reasons for this can, of course, be many and varied, for one thing because there are public holidays there – such as Sundays in Germany – or because the employee has to observe certain office days

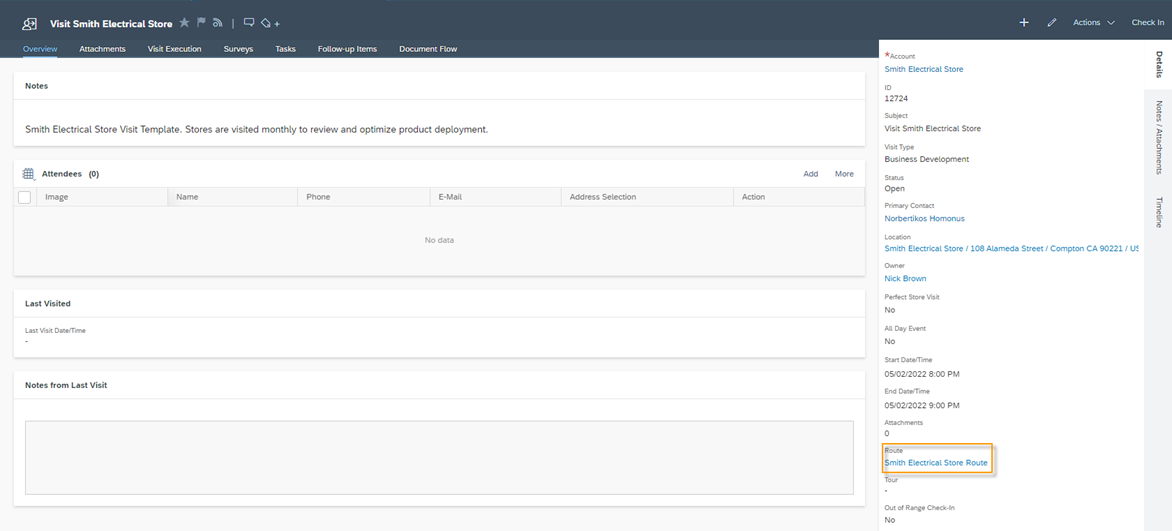
Sales Territory                   Select the sales territory. Since a route does not necessarily have to be assigned to a customer and thus spans multiple locations, this is important for the assignment and also for the authorization

Organizer                             Select the organizer for the route. This person is responsible for managing the route but does have to execute it himself. Per default the Organizer will also be assigned as the Organizer for the Visits of this route

Owner                                   The owner is responsible for the route and also performs it. Per default the Owner will also be assigned as the Owner for the Visits of this route

Notes                                    Write down important and relevant information in the notes

In the More Details tab, you can add more information about the route and the later included visits.

Start Time                                       Specify the time from when the calculation of visits should start. The first visit will then start at this time. The Start Time of the nest visit will then be calculated as follow:

Start Time Visit(n) =Start Time Visit (n-1) + Travel Time Visit (n) + Average Prep. Time Visit (n)

Visit Prep Time (Average)           The average time you need to prepare visits. You have to consider the follow-up time of the last visit and the possible preparation time of the next visit

Visit Duration (Average)              The average length of a visit

Time Zone                                       Define the time zone of your route for the calculation

Automatic Rescheduling            If you enable this indicator, the times and dates will be automatically redetermined when you make a change in a proposed visit

Visit Type                                        Select the visit type that the later included visits should receive

Assign the Sales Organization, Distribution Channel and Division for organizational allocation. In the Involved Parties and Attachments tabs, you can add additional co-workers to the route and add attachments.

As already mentioned, it is possible for a route to span multiple sales territories. In such a case, you basically have two setting options. The first one is that you define statically and manually the sales territory and owner for this route. This means that all resulting visits will also have this sales territory and therefore one responsible employee. Alternatively, you can enable the indicator Derive Owner From Territory and thus dynamize the territory and owner derivation of the visits. In this way, the sales territory and owner of the respective customer is always written to the Visit business object. The Ende Date of your Route will be calculated automatically, based on your Selection of Customers.

Planning of your Route Visits

In the Proposed Visits section of the Overview tab, you can now select the customers for this route. Via the two buttons Add and Add on Next Day you can add the customers to your route. With Add the visits will be added to the end of the last day group and with Add on Next Day the customers will be added automatically on the following day of the last entered date group. Both buttons take you to a Customer‑Selection screen that is divided into three sections. The first section is the filter. Here you can select the customers based on defined selection criteria. The second section is the left list section. Here your customers are listed with name and address data. In the third section you can see the map, where you can also select the customers to visit.

After selecting your customers, you can add this made selection to your route via the two buttons Add and Add to Date. The Add button adds the customers to the date already set. With the Add to Date button you can select a date in the second step, to which the visits should be suggested. If you select a date that falls on a weekday that you excluded when creating No Visit on the Following Days, the system automatically determines the next selected workday.

As you can see in the figure below, in the Proposed Visits section, the proposed visits are grouped into days. You can now customize all the settings per proposed visit individually. You can also determine the travel time here. The following functions are available to you when planning this route via the More button:

Refresh                                Refreshes the Proposed Visit list and shows the recalculated time slots

Copy                                     You can select a proposed visit in the list and then copy it. The copied visit will always be added before the entry to be copied in the same day group

Change Date                       You can change the date for selected proposed visits

Show/Refresh Route Owner’s Schedule       Refreshes the Route for the Owner

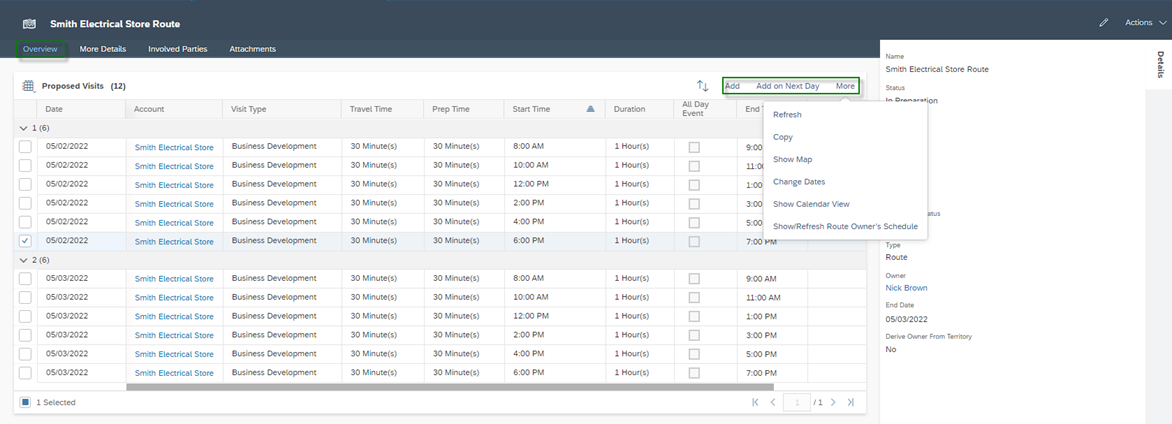
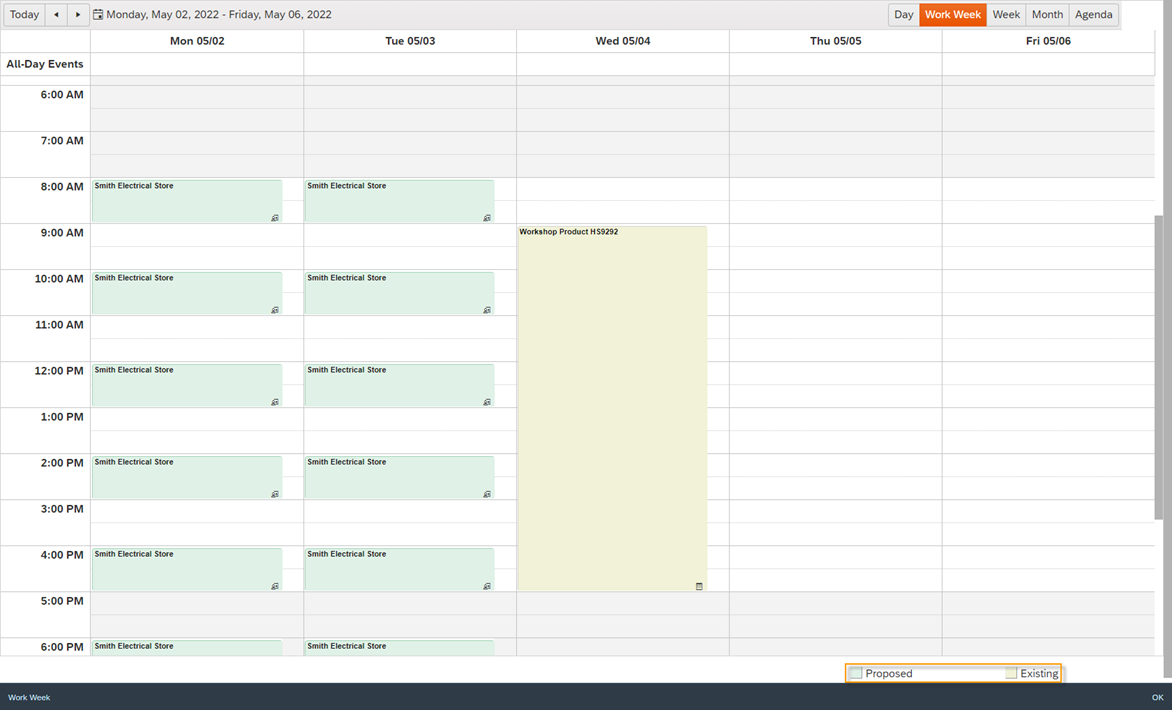
There are also two route planning views available under the More button. Map View and Calender View.
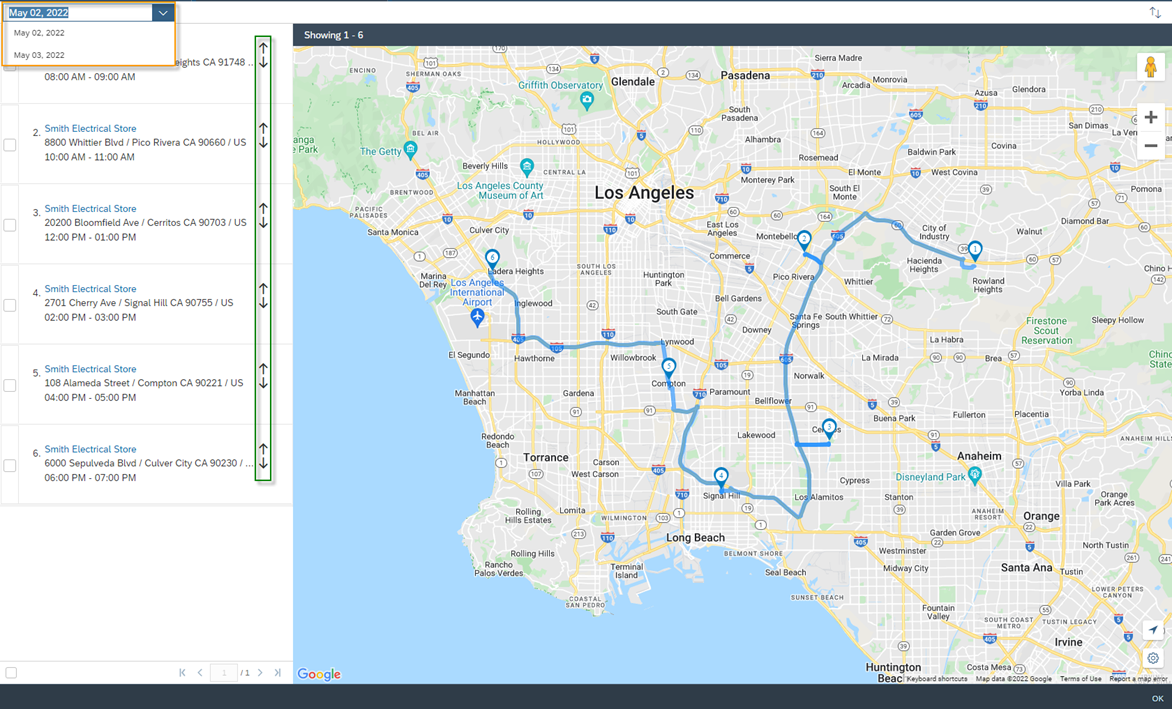
Calender View

This view visualizes the route by showing you the route to take in Google Maps. You can select the date – which you want to plan – in the upper left corner. With the help of the Arrow Icons you can change the position in the route of the particular visit.

Calender View

This view helps the Business User to schedule the visits. In light green the Proposed Visits are displayed, while in light yellow you can see the already existing calendar entries.

If you have planned the route completely, you can now activate it via Actions and then click on Active. After that – also under Actions – the Generate Visits function is available. Now the visits will be created in the background on the basis of this route. In the Business Object visit you will also always find the link to the route.

Creation of a Route Template

If you want to create a template, make sure that you select Template as the route type. Based on the template, you can then simply create and plan a route as a copy of the activated template via Actions. Use the Create Route From Template Function for that purpose. All data of the template will then be copied into the actual route. Working with the template therefore makes sense if you frequently perform the same or similar routes. In fact, you can also schedule the template periodically if you regularly perform the complete identical route. To do this, navigate to the More Details tab and fill in the fields in the Repeat section.

With the Add On maiTour it goes even one step further. Here, overnight stays, hotels, traffic situation, prioritizations and much more are considered. Especially for companies with a very high visit density, this add on is an optimal extension for your SAP Sales Cloud solution. You can find more information on the Nagarro ES website here: maiTour for SAP® Sales Cloud – Intelligent Tour Planning – Nagarro ES (nagarro-es.com).

Do you need consulting from our experts?

The Customer Experience team at Camelot ITLab deals with exciting and challenging CRM related topics every day and serves a large portfolio of different customers from a wide range of industries. Trust in this collaboration and feel free to contact us at tlil@camelot-itlab.com.

Was this article helpful?

If you like our content we would highly appreciate your review on Trustpilot


#SAP C4C #SAP Cloud 4 Customer #Cloud 4 Customer #Cloud for Customer #SAP Sales Cloud #Sales Cloud #Visit #Visits #Check-In #Check-Out #Out of Range #Geolocation #Latitude #Longitude

Receive the latest news

Subscribe To our SAP Sales & Service Cloud Newsletter

Get notified about new articles