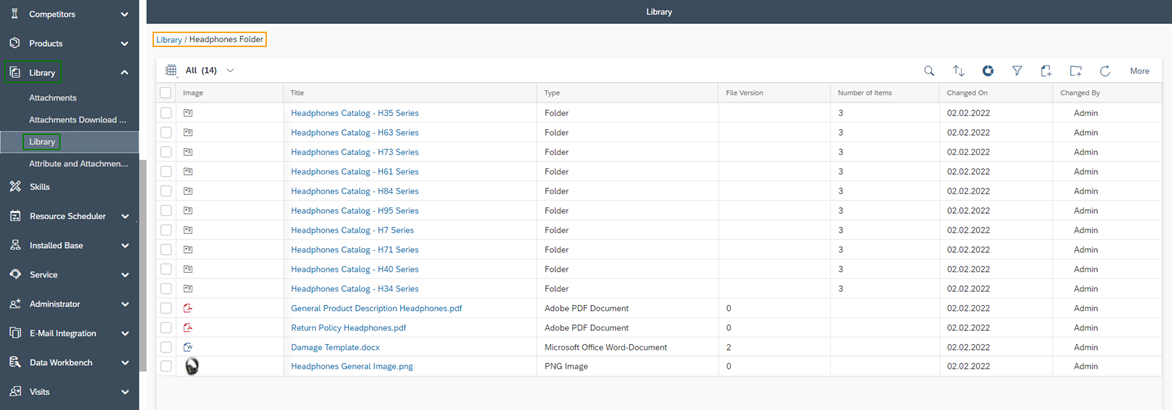
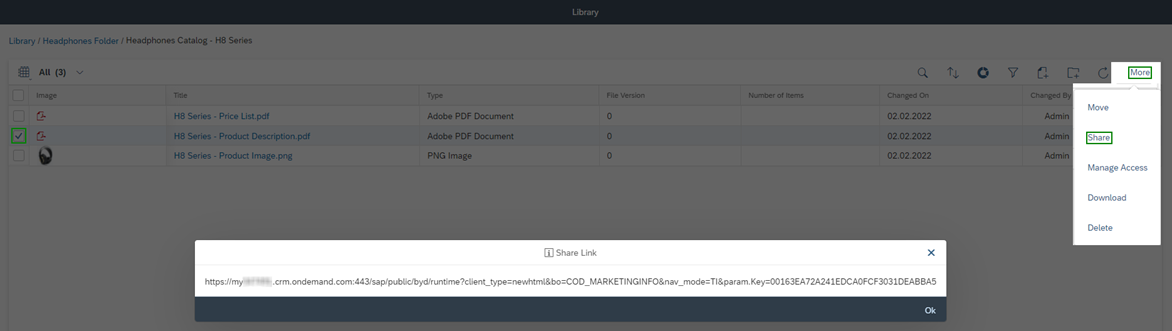
In the Work Center View Library, you can manage attachments in folder structures to make frequently used documents available to your business users. The following figure shows such a folder and file structure. You can see that there are subfolders for all Series of Headphones. The Number of Items information column tells you how many documents and subfolders are contained in these folders – in the example shown, all have three items. You can differentiate a folder from a file based on three characteristics. First, you will always see the folder icon ![]() in the Image information column. Second, the Type is always Folder and third the File Version information column is always empty. For attachments you always see the logo of the file type under Image, unless it is a common image file like .jpg or .png, then you see a preview of the image. For all attachments you will then also see a number for the file version – even if you have not activated this for this file you will at least see 0. At the top left you will see the folder path you are moving in. The functionality supports up to three levels. In the example shown, you are in the Headphones folder of the Library. Here you can also jump to different main or subfolders.
in the Image information column. Second, the Type is always Folder and third the File Version information column is always empty. For attachments you always see the logo of the file type under Image, unless it is a common image file like .jpg or .png, then you see a preview of the image. For all attachments you will then also see a number for the file version – even if you have not activated this for this file you will at least see 0. At the top left you will see the folder path you are moving in. The functionality supports up to three levels. In the example shown, you are in the Headphones folder of the Library. Here you can also jump to different main or subfolders.
In the Work Center View Library, you can use the two buttons Create Folder ![]() and Create File
and Create File ![]() in order to build up your folder structure and to attach documents to these folders. In the example shown above, Series H8 should be added as a folder and the three files Price List, Product Description and a Photo should be added.
in order to build up your folder structure and to attach documents to these folders. In the example shown above, Series H8 should be added as a folder and the three files Price List, Product Description and a Photo should be added.
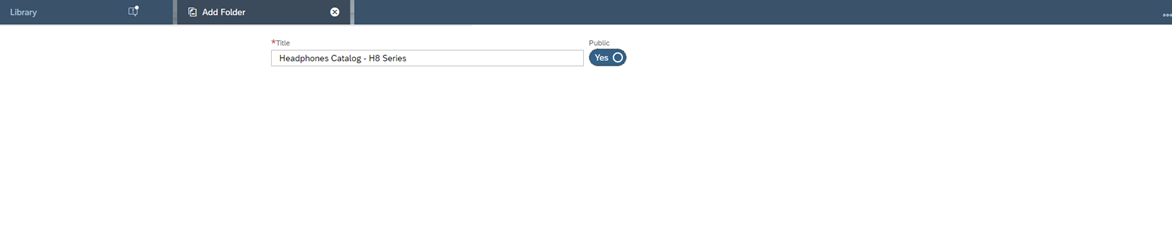
After clicking the Create Folder Button , you will get to the creation screen of a folder. Enter a Name for the folder and determine whether this folder is publicly accessible (Public Indicator enabled) or should be provided with permissions (Public Indicator disabled). The indicator is disabled by default. The two figures below show the difference. When the indicator is set to disabled, you can assign permissions based on various parameters – such as Sales Data, Accounts, Employees or Territories. More about this you can read in the Administrator Chapter SAP Sales Cloud – C4C Is Easy – Business Roles. In this case, the folder is made freely accessible. After that click on Save and Open to create the folder and immediately enter the folder path.
Creation of a Folder with Public Indicator disabled:


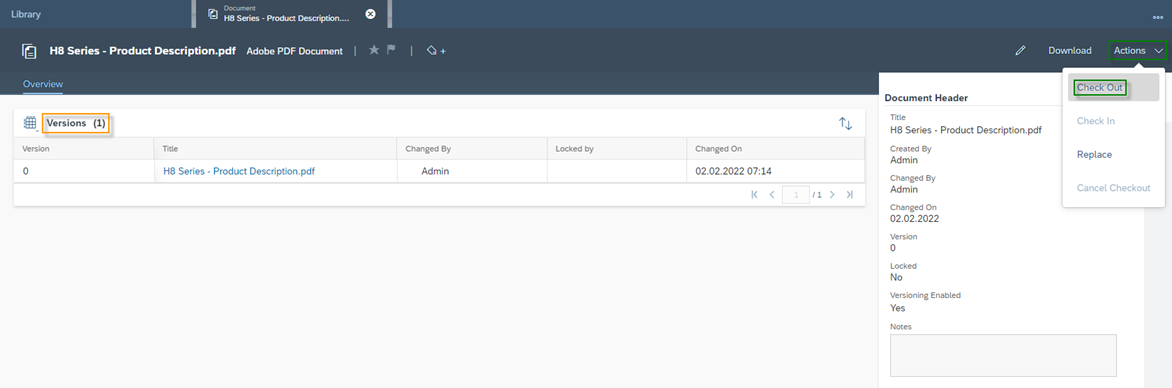
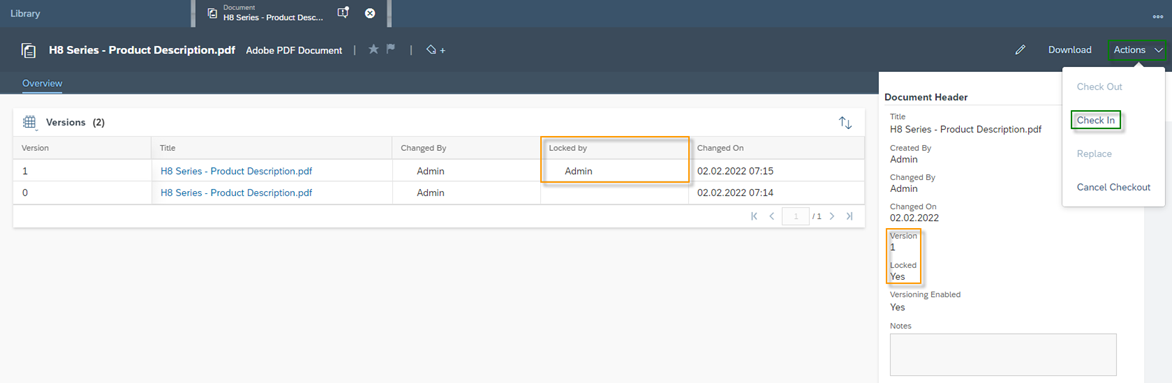
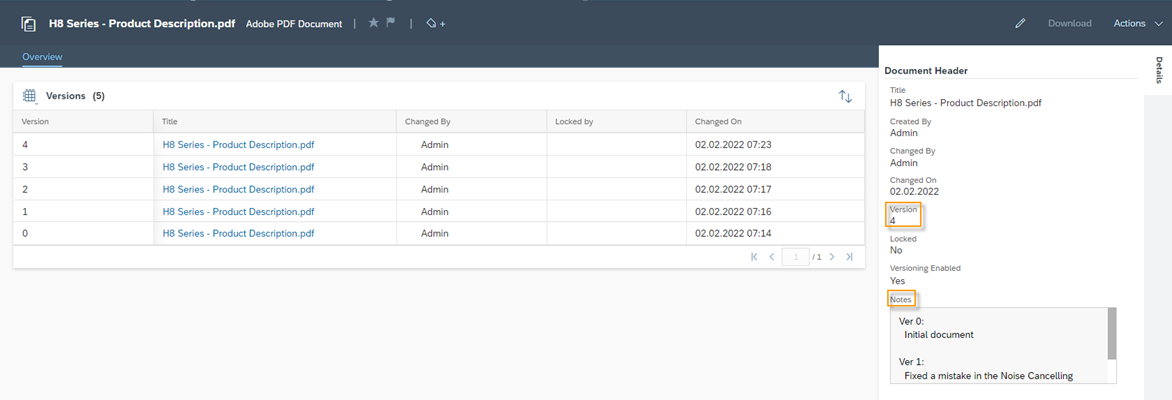
The files can now be added to this folder. To do this, click on the Create File Button ![]() . In the creation mask for documents, you can then add a File from your computer and then define a Title. By default, the file name of your added file is taken over into the Title field. Decide at this point whether you want to allow the file to be versioned with the Enable Versioning Indicator. More about Versioning can be found in the next Chapter. In the last step you can also determine, with the Public Indicator at the file level, whether the file should be publicly accessible or not.
. In the creation mask for documents, you can then add a File from your computer and then define a Title. By default, the file name of your added file is taken over into the Title field. Decide at this point whether you want to allow the file to be versioned with the Enable Versioning Indicator. More about Versioning can be found in the next Chapter. In the last step you can also determine, with the Public Indicator at the file level, whether the file should be publicly accessible or not.


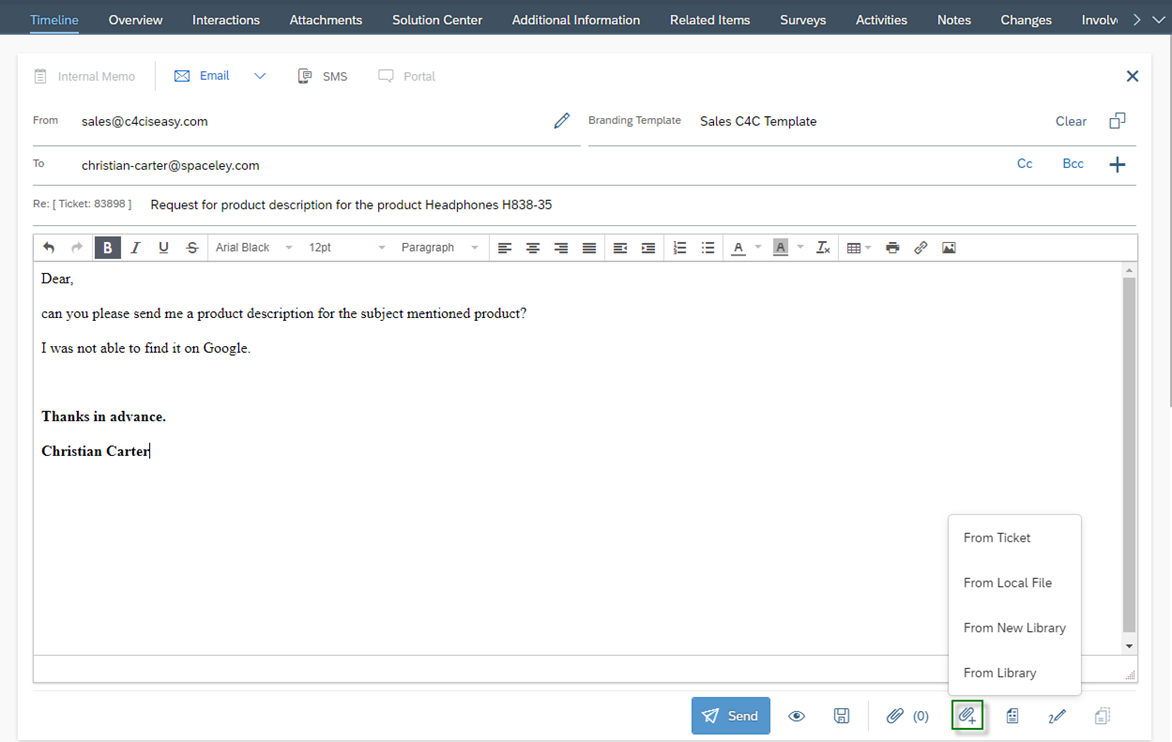
You can use documents from your library in any business object under the Attachments section. The figure below shows an example of how you can use the library in the Business Object Service Ticket to answer a customer concern as quickly as possible. As you can see in the figure, the customer is asking for a product description for product Headphones H838-35. Click on the Add Attachment Icon ![]() . Here you can select From Library or From New Library. In the case of the Library, all documents are displayed unsorted without folder paths, while in the case of the New Library you can search for your documents by the folder paths.
. Here you can select From Library or From New Library. In the case of the Library, all documents are displayed unsorted without folder paths, while in the case of the New Library you can search for your documents by the folder paths.