The Work Center View Leads can be found in both the Work Center Sales and the Work Center Sales Campaign. From both areas in the SAP Sales Cloud you have the possibility to create a new lead via the Create ![]() button.
button.
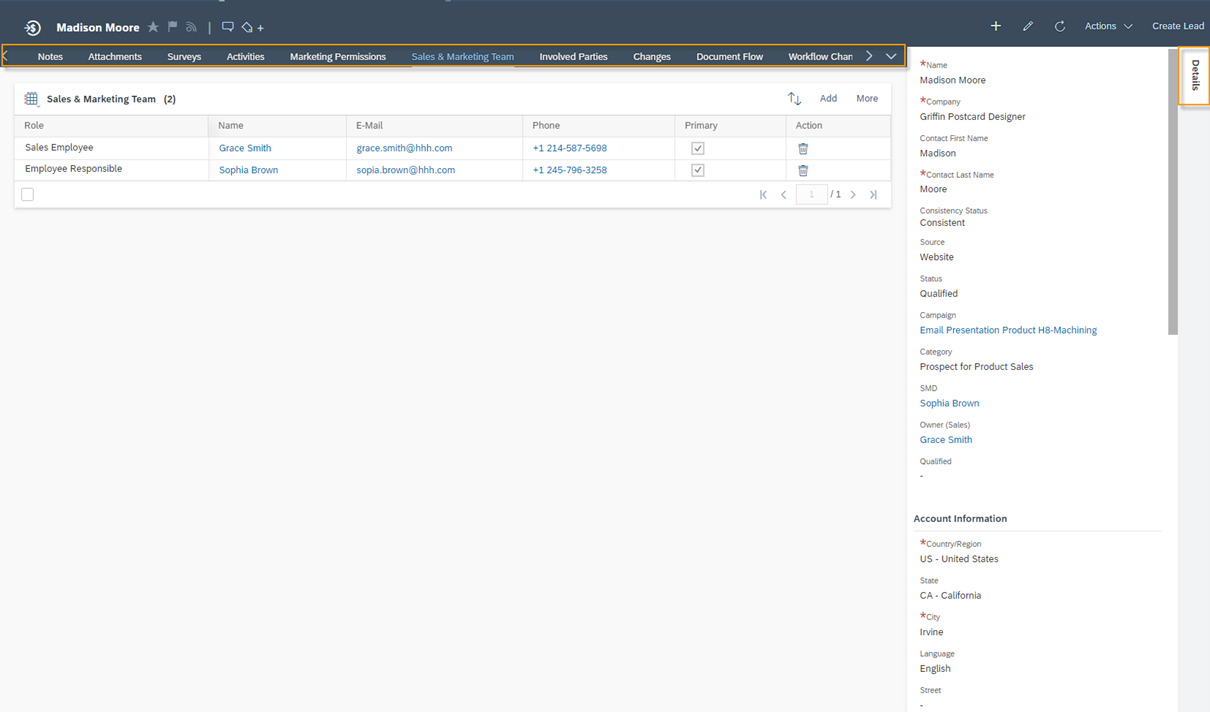
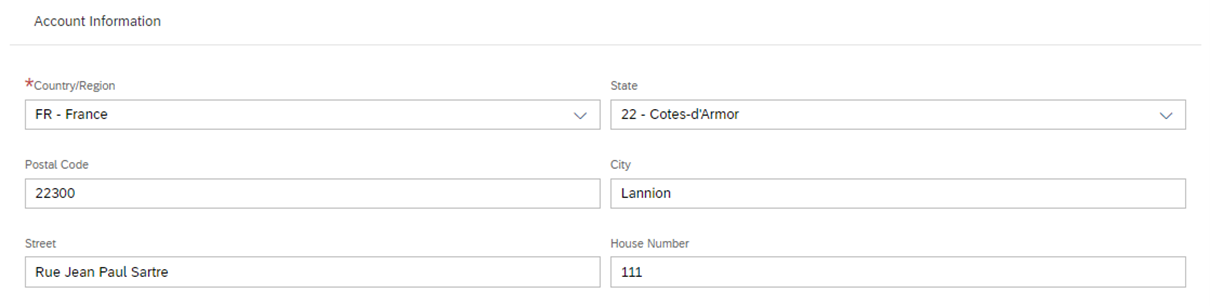
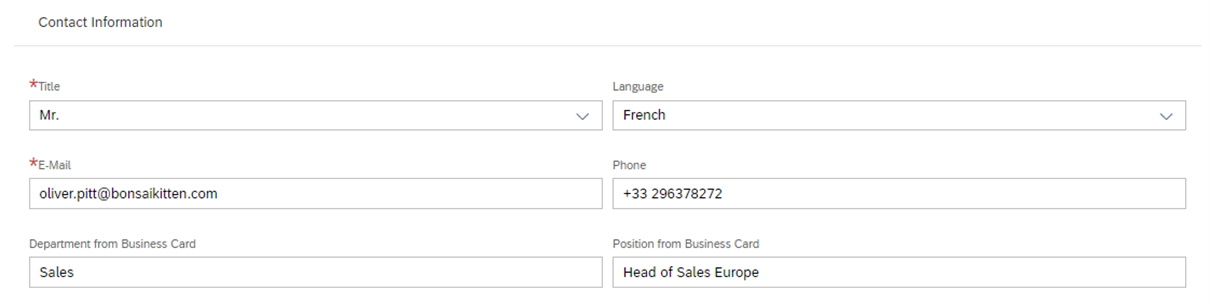
When creating a lead, the mask is divided into three sections. The first one is Lead Information, where you specify basic information about the lead. The second section is Account Information, where you enter information about the customer. The third section is Contact Information, where you can enter data about the contact person.
Lead Information
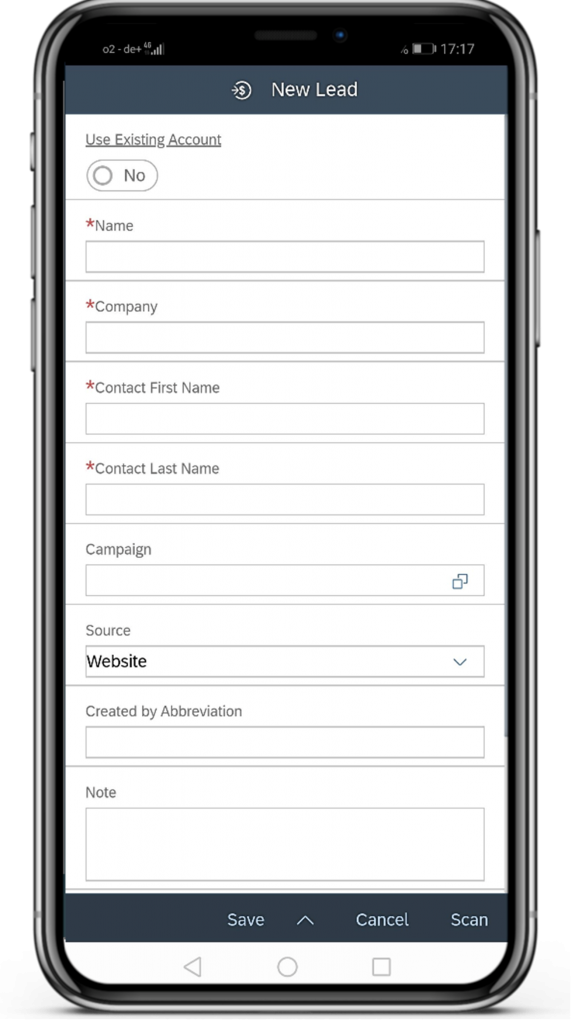
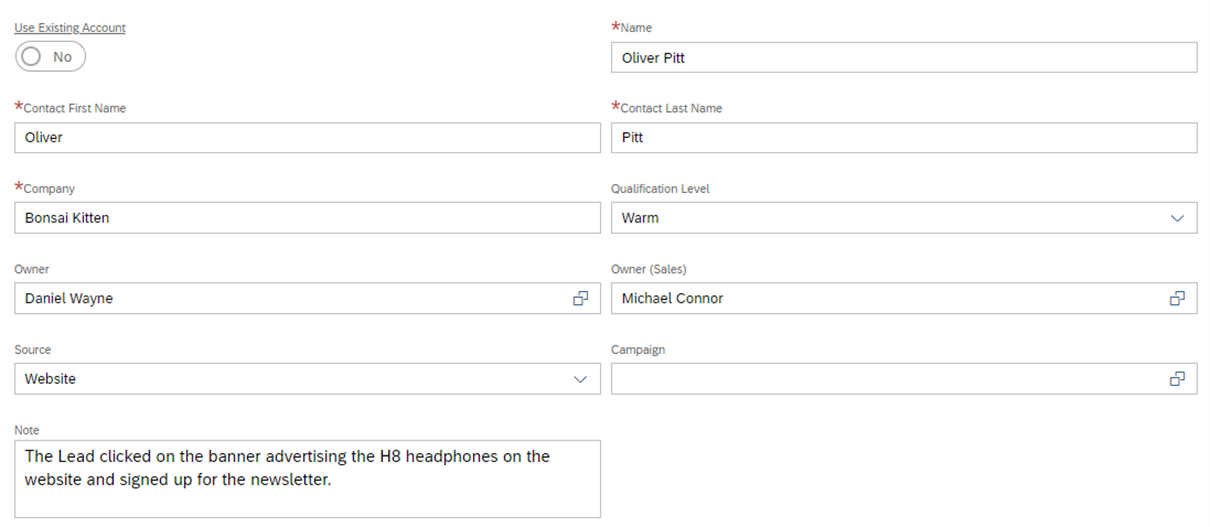
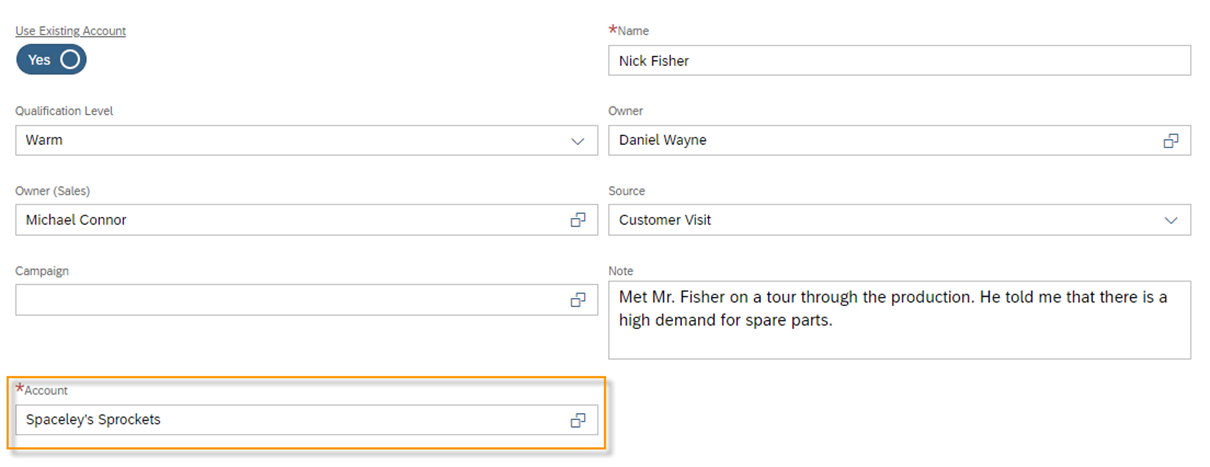
In the Lead Information section, you can enter all the important relevant information for this lead. Name, Source, responsible employee marketing (=Owner) and sales, are such important fields. An important feature is the Use Existing Account field. Here you specify if it is a lead that should be assigned to an existing customer (The Indicator should be set to active) or if it is a lead for a customer you do not know yet (The Indicator should be set to deactivate). The creation of a new Lead without an existing Account looks as follows:
With the SAP Sales Cloud application on your mobile device, you can use the business card scanner. This function is only available in the APP, but not when you access the C4C application via the browser. The Business Card Scanner is only working when purchasing the Scanner API interface by ABBYY®. For more information check the following link: ABBYY Cloud OCR SDK – Text recognition via Web API | ABBYY.
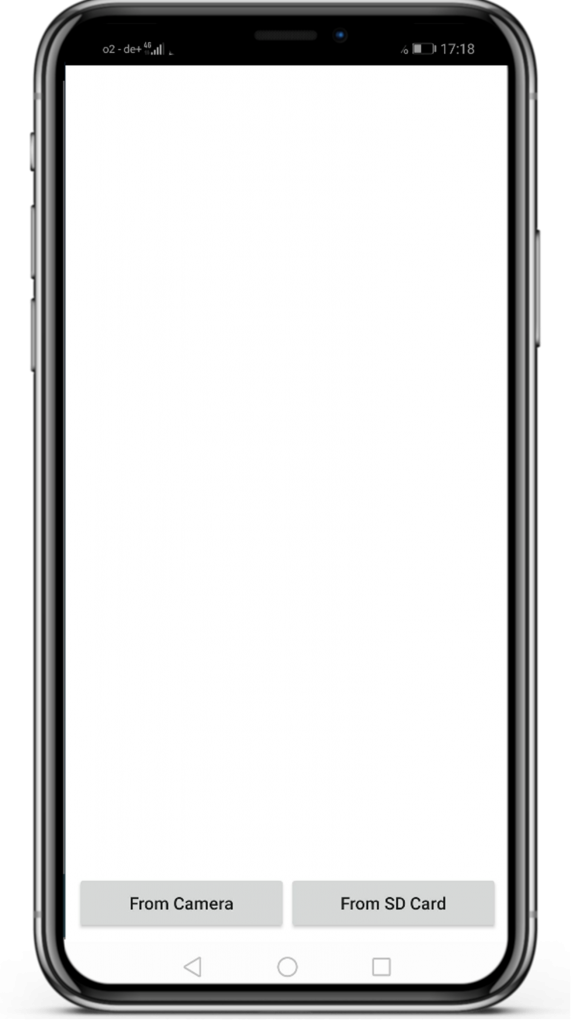
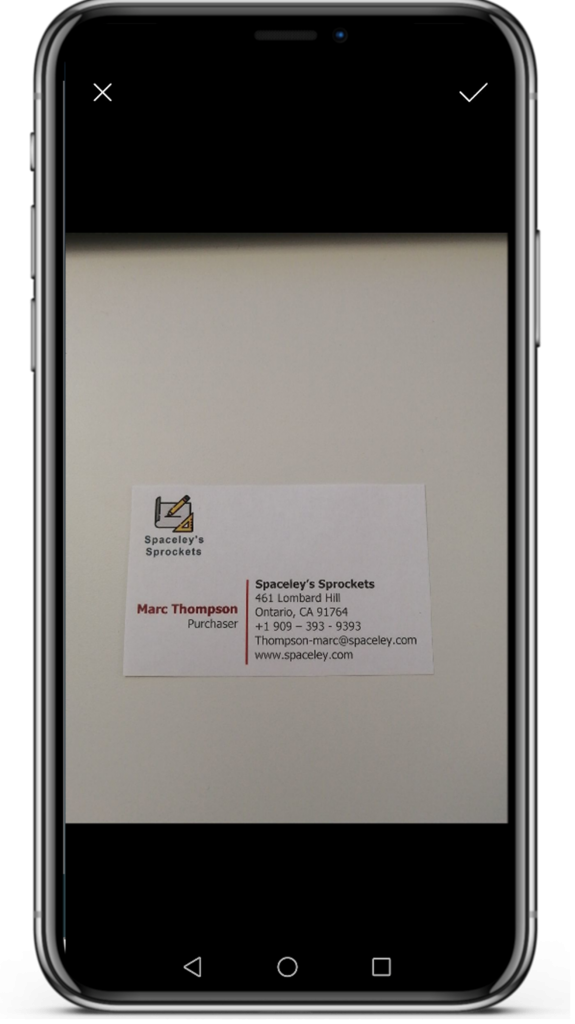
To work with the business card scanner, click on create New Lead in the APP on your mobile device. In the bottom right you will find the Scan button. Click on it. In the next step you can choose whether you want to scan an existing photo (From SD-Card) or create a new one (From Camera). When creating the photo, pay attention to the focus of your camera so that all the words can be scanned sharply. You can now confirm the shot photo with Check ![]() or Discard it with
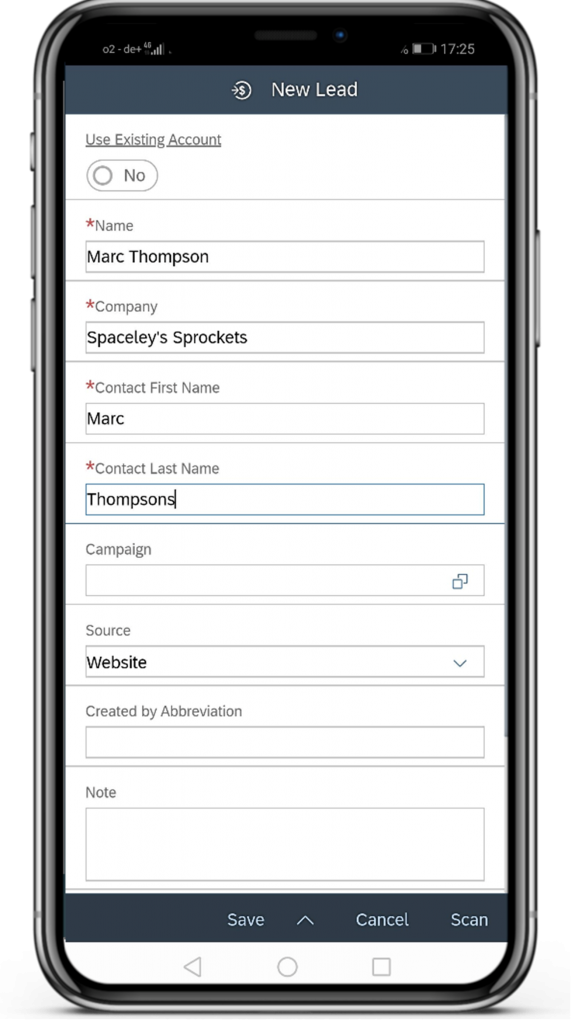
or Discard it with ![]() . If you confirm the photo, the photo will be scanned by OCR scanner and the data from the photo will be transferred to the respective fields. You can then check these again in the next step. Add further information of your lead and then finally Save your Lead.
. If you confirm the photo, the photo will be scanned by OCR scanner and the data from the photo will be transferred to the respective fields. You can then check these again in the next step. Add further information of your lead and then finally Save your Lead.