Leads
If a businessperson hands you a business card at an exhibition, a prospect fills out a contact form on your website or signs up for your newsletter, then you have generated a lead. In sales and marketing, a lead refers to contact with a prospect who provides the company with their contact information. A lead is also referred to as a "cold contact" and the aim is to establish a business relationship.
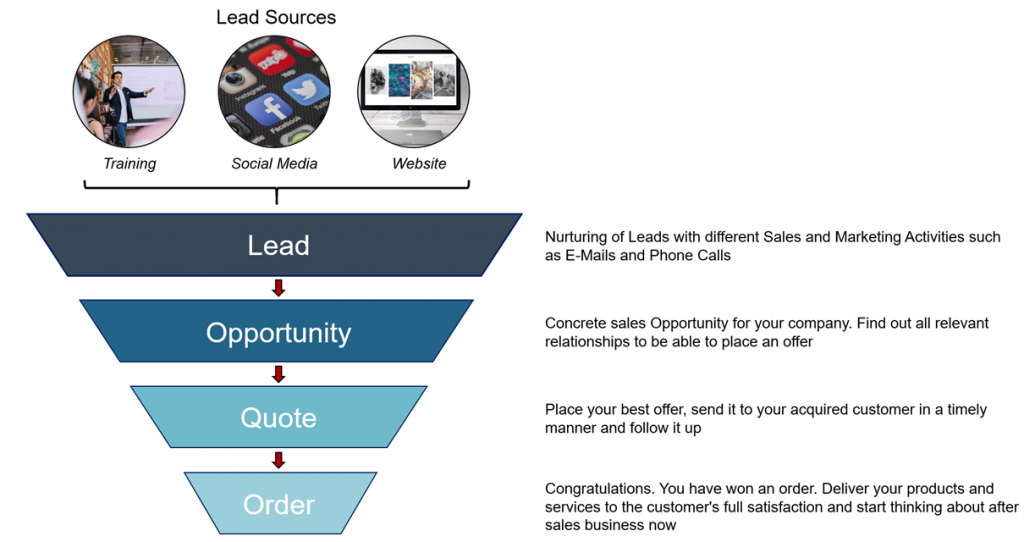
Lead generation is the first step for marketing and sales to introduce their own products, services or the name of the company. Downstream of lead generation, the nurturing process usually follows, which means enriching the lead with information so that a purchase follows. Typical Lead Nurturing can be done through different activities – such as E-Mail Surveys, Telephone campaigns, etc. A typical sales funnel can be illustrated as follow:
1. Creating a Lead
SAP Sales Cloud offers a wide range of different options to create a new Lead. Since Leads are generated from different sources such as your Website, Marketing Campaigns, Exhibitions, etc., this offers you full flexibility to create your Leads. You can create leads as follows:
- A Business User can create a Lead manually in the System
- The Leads can be imported from a Microsoft Excel Spreadsheet
- Create leads through the OData API, which gives you the possibility to connect your Website with the SAP Sales Cloud
- Create a Lead through a scan of a Business Card
1.1. Create a Lead manually
The Work Center View Leads can be found in both the Work Center Sales and the Work Center Sales Campaign. From both areas in the SAP Sales Cloud you have the possibility to create a new lead via the Create ![]() button.
button.
When creating a lead, the mask is divided into three sections. The first one is Lead Information, where you specify basic information about the lead. The second section is Account Information, where you enter information about the customer. The third section is Contact Information, where you can enter data about the contact person.
Lead Information
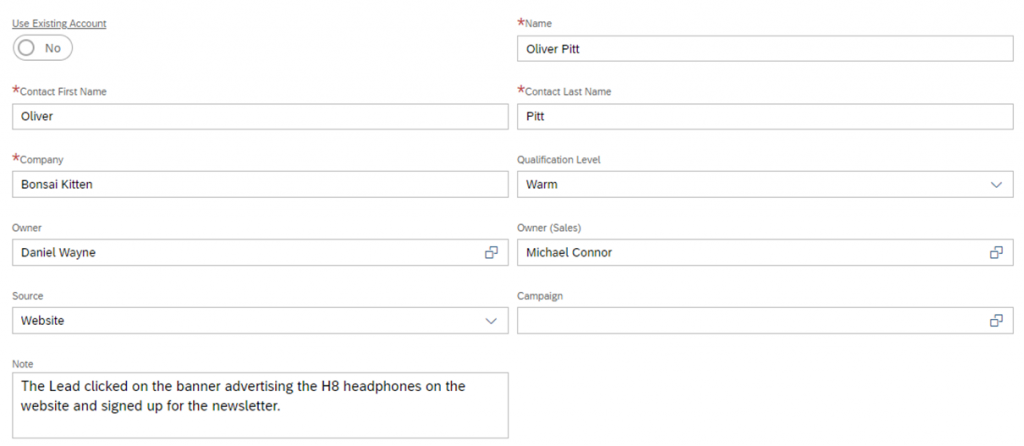
In the Lead Information section, you can enter all the important relevant information for this lead. Name, Source, responsible employee marketing (=Owner) and sales, are such important fields. An important feature is the Use Existing Account field. Here you specify if it is a lead that should be assigned to an existing customer (The Indicator should be set to active) or if it is a lead for a customer you do not know yet (The Indicator should be set to deactivate). The creation of a new Lead without an existing Account looks as follows:
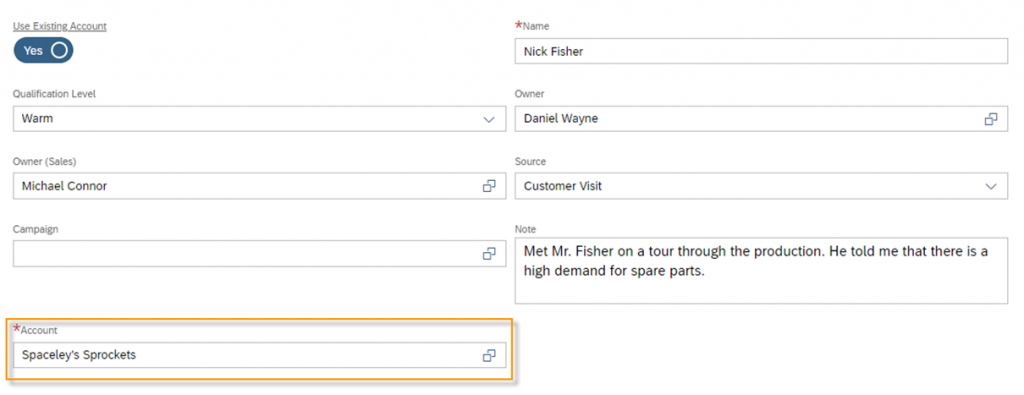
The creation of a new Lead with an existing Account looks as follow, where the difference lies in the Account field. For an existing customer, you select an existing Account from your database, while creating a lead for a new customer, this field is a free text field.
Account Information
If this lead cannot be assigned to an existing customer, then you can store the customer’s address information here – such as Country, State, Postel Code, etc. If you select an existing customer, this mask is pre-filled with the customer’s data.
Contact Information
In this section enter all important information about the contact person – Title, what Language the contact person speaks and of course important contact information such as E-Mail address, Phone number etc. After filling out this section confirm your data entry with Save.
The Leads can be also automatically assigned the responsible Marketing and Sales Employees. For Further Information please check Territory Management.
When creating a lead, there is also the possibility of a duplicate check. After entering all relevant data, you can start this check by clicking on the Check for Duplicates button or simply click on the Save button. Both will trigger the duplicate check. As a result you will get a list of possible duplicates, which is separated into Leads, Account and Contact and Account. This ensures that a lead is not already a known Account or Contact.
1.2. Import Lead from Microsoft Excel
For importing Leads from Microsoft Excel®, you need to have the SAP Sales Cloud Add-In for Microsoft Excel®. This can be downloaded in the Application itself, when clicking on your User Icon and then on Downloads. To import leads go to the Work Center View Leads, click on More and then on the Import from Microsoft Excel® button.
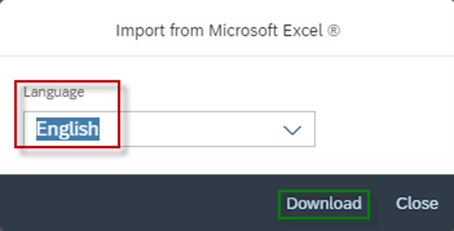
Next you have the option to select the Language in which you want to Download the template.
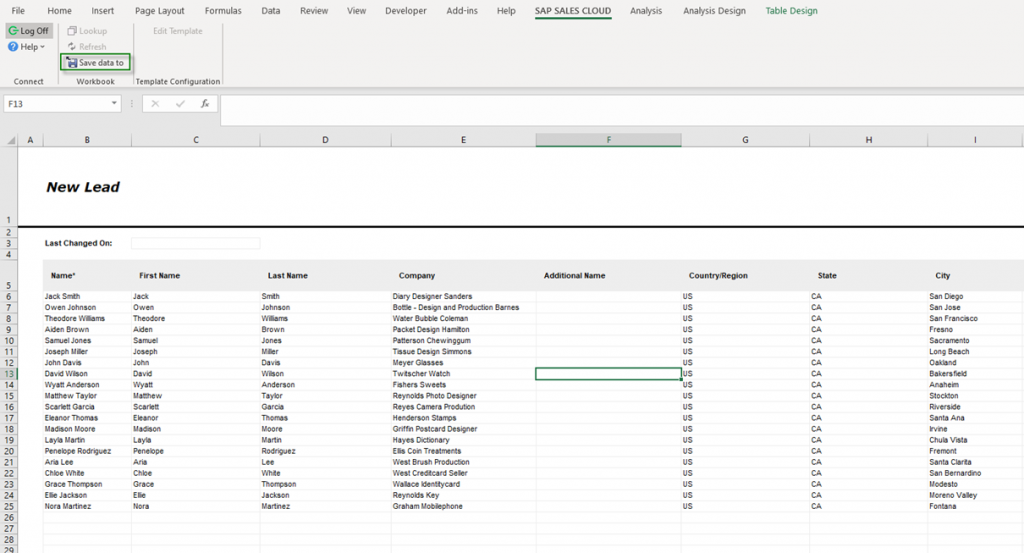
Prepare all data you want to upload for your leads in the Spreadsheet. Data fields of type List are always a special challenge, because here you may only enter specific field names or the technical keys. An example is the data field Country, where you have to be very careful how you enter the data. Once you are done preparing the template go to the Ribbon SAP SALES CLOUD, log on to your tenant and click on Save data to.
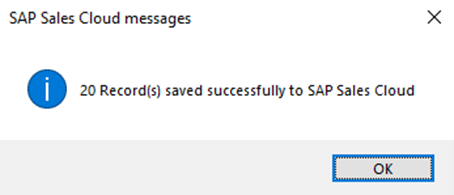
If you have filled in your template correctly, you will receive the following success message after the upload:
1.3. Create a Lead with the Business Card Scanner
With the SAP Sales Cloud application on your mobile device, you can use the business card scanner. This function is only available in the APP, but not when you access the C4C application via the browser. The Business Card Scanner is only working when purchasing the Scanner API interface by ABBYY®. For more information check the following link: ABBYY Cloud OCR SDK – Text recognition via Web API | ABBYY.
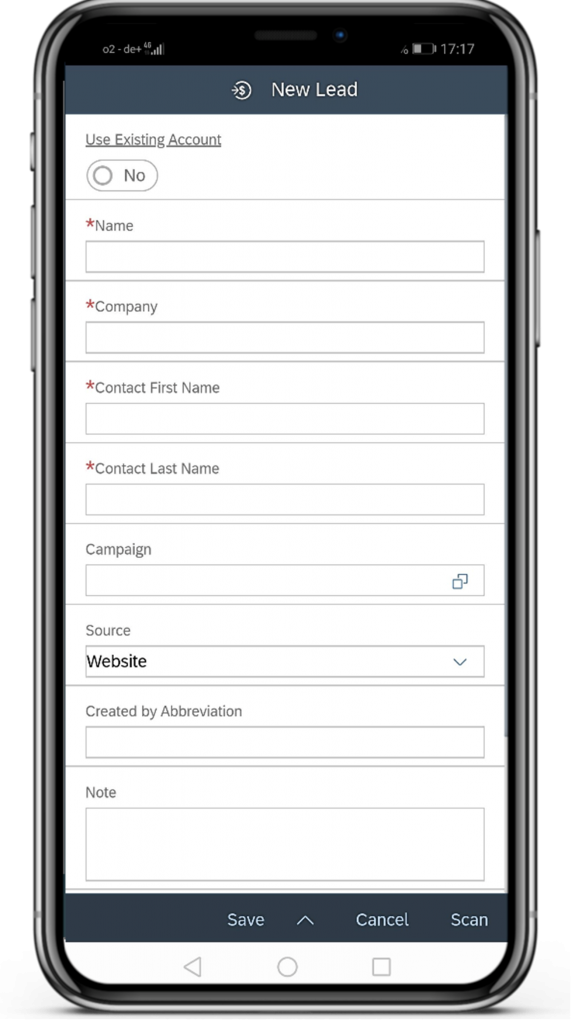
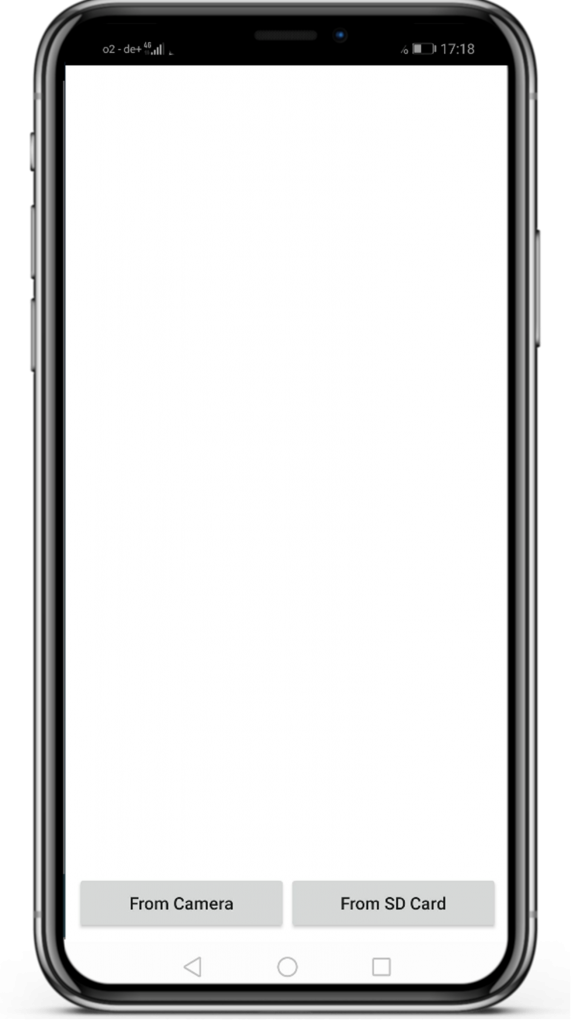
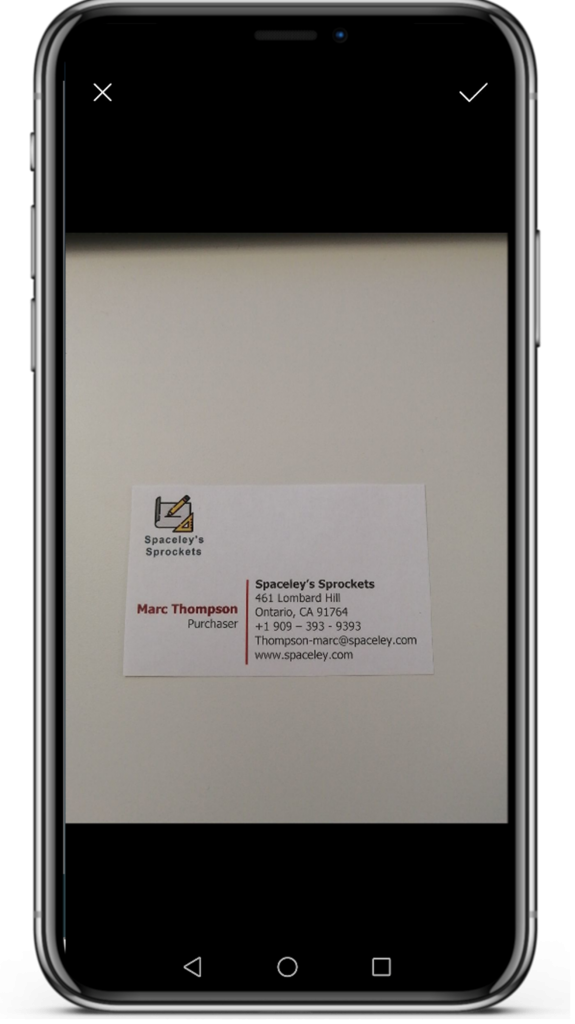
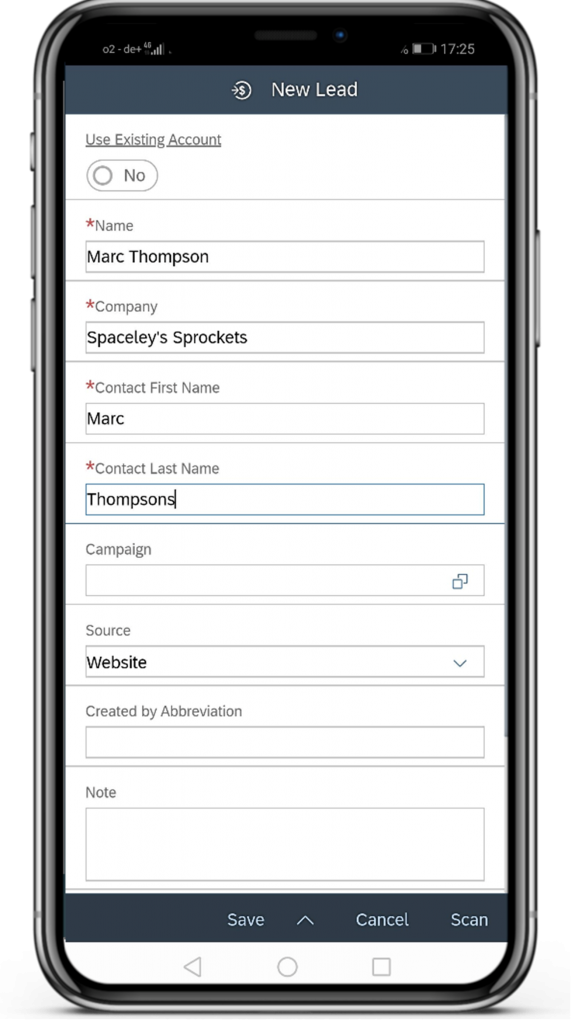
To work with the business card scanner, click on create New Lead in the APP on your mobile device. In the bottom right you will find the Scan button. Click on it. In the next step you can choose whether you want to scan an existing photo (From SD-Card) or create a new one (From Camera). When creating the photo, pay attention to the focus of your camera so that all the words can be scanned sharply. You can now confirm the shot photo with Check ![]() or Discard it with
or Discard it with ![]() . If you confirm the photo, the photo will be scanned by OCR scanner and the data from the photo will be transferred to the respective fields. You can then check these again in the next step. Add further information of your lead and then finally Save your Lead.
. If you confirm the photo, the photo will be scanned by OCR scanner and the data from the photo will be transferred to the respective fields. You can then check these again in the next step. Add further information of your lead and then finally Save your Lead.
2. Lead Nurtering
On the one hand, lead nurturing includes all measures a company takes to address a lead with relevant information at the right time – for example, via an e-mail or telephone campaign – in line with the phase the lead is currently in. However, lead nurturing also includes the further qualification of leads and thus the enrichment of information that could be relevant for a prospective purchase.
2.1. Overview of the Business Object Lead
In the Business Object Lead many information fields and functions are available to you to be able to nurture your lead sufficiently. In the following, all relevant fields and tabs will be explained.
Relevant Lead Data Fields
Campaign
Campaigns typically generate leads. For example, a campaign can be designed by Google Ads, so that visitors sign up for an event organized by you via advertising in Google. The field Campaign offers you the possibility to link your campaign to the leads.
Category
With the category you have the possibility to differentiate your leads. By default, you can categorize your leads as Prospect for Consulting, Prospect for Product Sales, Prospect for Service, Prospect for Training.
Consistency Status
The Consistency Status can be either consistent or inconsistent. This will be checked automatically by your Application and considers information fields such as Name, E-Mail, etc.
Qualification
Processing leads is always about qualifying and evaluating your leads. In SAP Sales Cloud it is possible to qualify your leads as Cold, Warm and Hot.
Source
The source describes where you got the lead from. Possible sources can be website, customer visit, training, etc.
Status
Open: Means that the Lead was created and not yet evaluated or qualified
Qualified: As soon as the lead was qualified – fill out the data field Qualification – the Status of the Lead changes automatically from Open to Qualified
Converted: When the lead was either converted into an opportunity or a customer, the status changes to converted
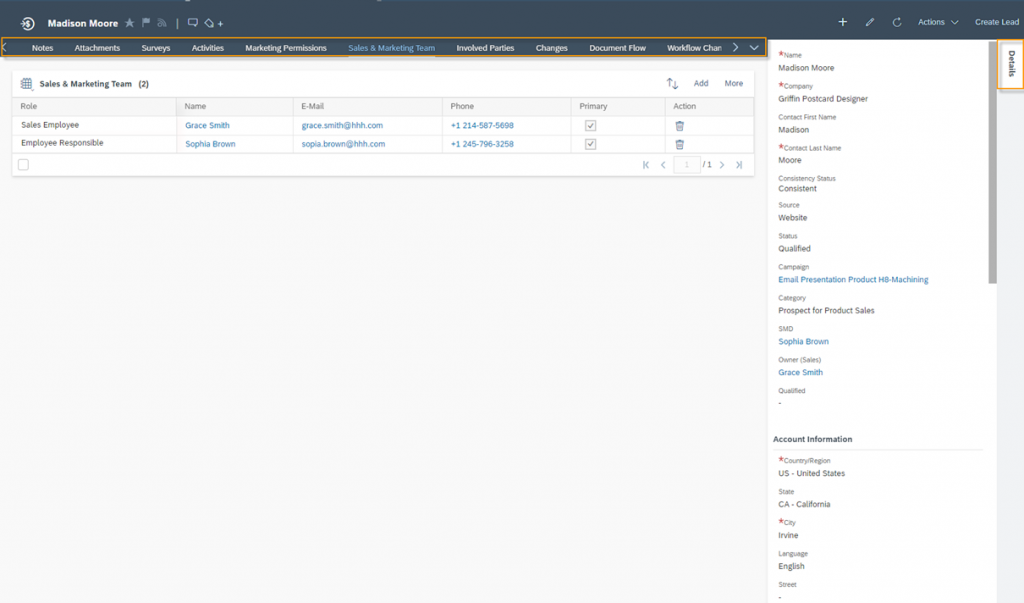
The Business Object, like the other elements in SAP Sales Cloud, is divided into the Detail area and various Tabs. The special thing about the Lead detail section is, that it is divided into the three areas Lead Information, Account Information and Contact Information. In the individual tabs you will find various options to enrich your lead with further information or all marketing and sales functionalities to convert this lead.
2.2. Overview of relevant functions
There are a various of useful functions that play a relevant role in processing leads in SAP Sales Cloud:
Assigning
The leads are usually automatically assigned by the realignment rules, which can be set up by your Administrator. With these rules, the assignment to the sales and marketing department can be derived on the basis of lead data – such as address data. You can find more information here: SAP Sales Cloud – C4C Is Easy – Realignment Rules. In addition, the administrator can use a workflow to set when the derivation of the area and the responsibilities should be triggered – e.g. when creating or saving each. However, each Business User is able to derive the Sales Territory, Owner (Sales) and Owner of a Lead by navigating to the Work Center View Leads, clicking on More and then on Assign Selected Leads Using Rules. This Button will trigger, that all custom settings in this three fields will be overwritten with the Results of the Realignment Rules by your Administrator. It’s important to know, that if no rule is set up, the system is assigning all leads you created to you as an Owner.
Deletion
In Cloud 4 Customer it is possible to delete leads. There can be various reasons for this: If it is a duplicate, the data is insufficient so that nurturing cannot be performed, or the lead was created incorrectly. To delete the Lead, go to the Work Center View Leads and click in the upper right on More Button. Here select the function Initiate Deletion.
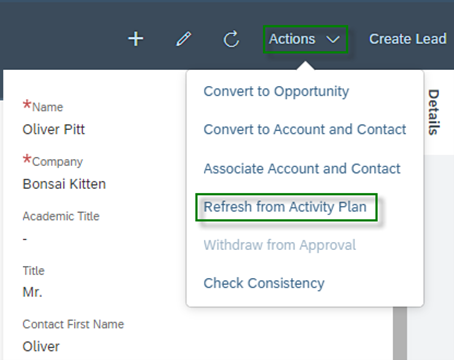
Refresh from Activity Plan
Activities can be organized via a planner. Several tasks and surveys can be assigned to a package, which can then be assigned to a business object via rules. For more information about that you can check Work Center Activity Planner. However, a Business User can Refresh from Activity Plan and gets all relevant Activities transferred into his Lead. This can be seen as kind of Guideline, how to proceed with the Lead.
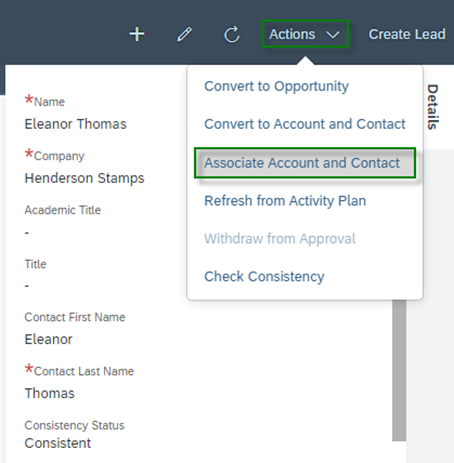
Associate Account and Contact
If, while processing your lead, you determine that it is an existing customer and contact, then you have the option of assigning your lead to an existing customer. To do this, go to the Actions button and then click on Associate Account and Contact.
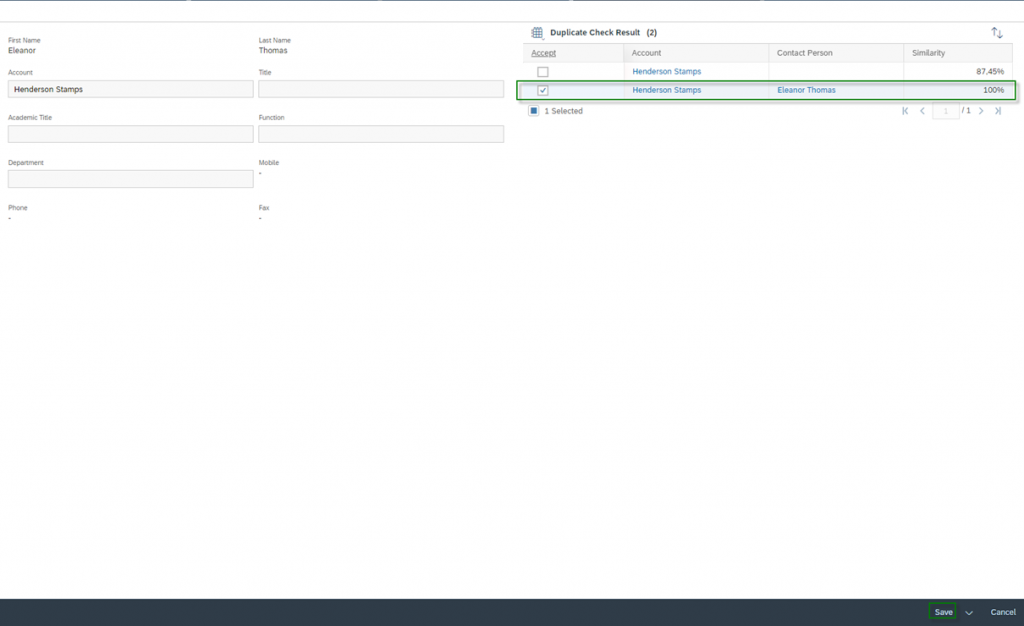
In the next step, you can then mark the already existing customer and contact person via the results of the duplicate check and finally confirm your selection with Save.
3. Convert Leads
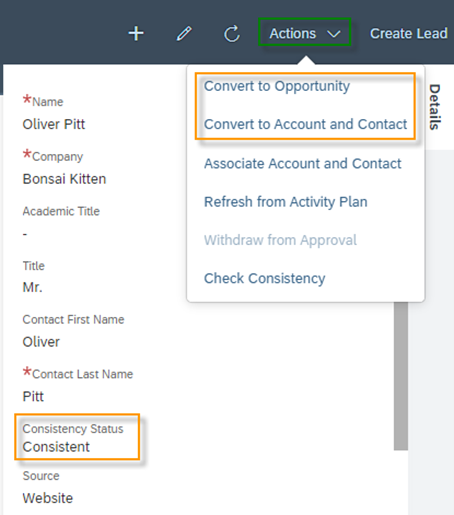
After lead nurturing is done and your lead acquisition is successful, you have the opportunity to convert your lead. Congratulations! You have reached the status of having identified a sales opportunity. It is important to know that you can only convert your lead when the Consistency Status is set to Consistent (see Check Consistency part in this Chapter). You have the option to convert your lead into an opportunity or into a customer with a contact person. You can find these options in the Business Object Leads and Actions.
Convert to Opportunity
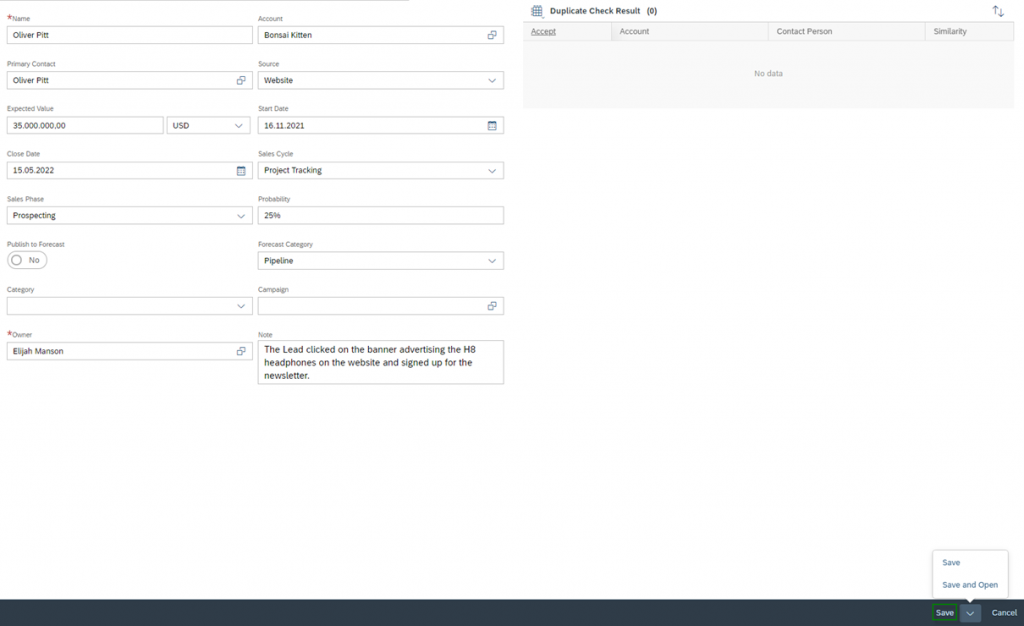
When converting a lead into an opportunity, you start with a form where you can add further information – such as Start Date and Close Date, Sales Phase, Probability, etc. – for the opportunity. As you will notice, most of the fields are already pre-filled with the information from the lead. It is always worthwhile to fully enrich the information in the lead, otherwise you will have to add it at this point of conversion at the latest. By clicking the Save button the opportunity will be created.
At the same time, an Account with the Role Prospect and a Contact Person is created in the background of the SAP Sales Cloud. This customer is also saved with the account information from the lead. So here again it makes sense to complete the account information of a lead.
In the lead itself, you will notice know, that the Status has been changed from Open to Converted. You can always see in the Conversation tab which business objects your lead has been converted to.
All further sales activities for your sales opportunity now take place in the business object Opportunity. It is possible to create multiply Opportunities from one Lead. In the best case, the next evaluation step is to create a concrete Quotation for your former lead.
Convert to Account and Contact
There may be several reasons why you want to convert your lead directly into a customer instead of an opportunity. For one, it’s possible that the business relationship could be built very quickly, so it quickly moves to a quote or order phase. On the other hand, it is also possible that you have already received a lot of customer information, so that it is more worthwhile to continue working in the business object account, even if a concrete sales opportunity has not yet arisen.
If you decide to convert your lead into an Account and Contact Person, the first step will take you to a form where you can add more information about the contact person. All information from the lead is transferred to this mask. If you then press the Save button, an account and a contact person will be created from your lead in the background. It is only possible to convert one Lead into one Account and Contact Person.
In this case the Status of the Lead has also been changed from Open to Converted. You can also see in the Conversation tab which business objects your lead has been converted to – in this case Account.
The Customer Experience team at Camelot ITLab deals with exciting and challenging CRM related topics every day and serves a large portfolio of different customers from a wide range of industries. Trust in this collaboration and feel free to contact us at tlil@camelot-itlab.com.
Was this article helpful?
If you like our content we would highly appreciate your review on Trustpilot
#SAP C4C #SAP Cloud 4 Customer #Cloud 4 Customer #Cloud for Customer #SAP Sales Cloud #Sales Cloud #Lead #BusinessCardScanner #BusinessCard #Leads #LeadNurturing #Nurturing #ConvertLeads #Covert #Hot #Warm #Cold #Converted #ConsitencyStatus

