Adaption - Creating and editing customer extension fields
Sometimes there are requirements for information in certain objects, which can’t be fulfilled by the standard fields. In that case you can create customer extension fields.
In this article the process of creating and editing customer extension fields will be shown by the example of accounts, but the procedure will be the same for other objects.
As a first step you have to navigate to the object you would like to add a new field to. Then open up the master layout by clicking the User-icon in the top right and select Start Adaption.
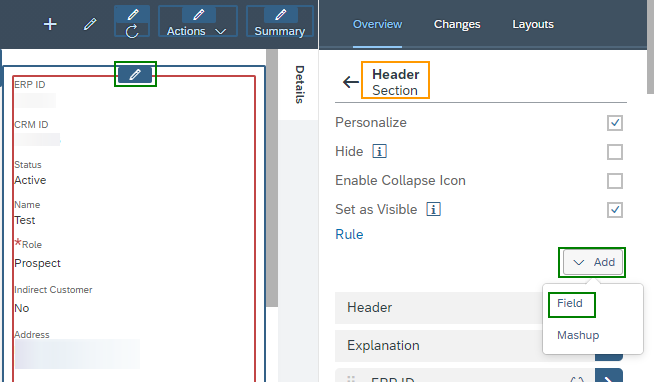
Each object has a detail view. This will be found on the right hand side or on the top (depends how your system was set up for displaying the details of an object). In this example it is on right hand side. Navigate to the header of the object by clicking on the edit-pen. Please note that name does not always have to be header section, it can be different in other objects. In the master layout open the drop-down-menu under Add select Field. In case the new field should not be in the details-section, this is no problem. It can be moved into another area after its creation.
For adding a new field now select Create Fields the top right of the following screen.
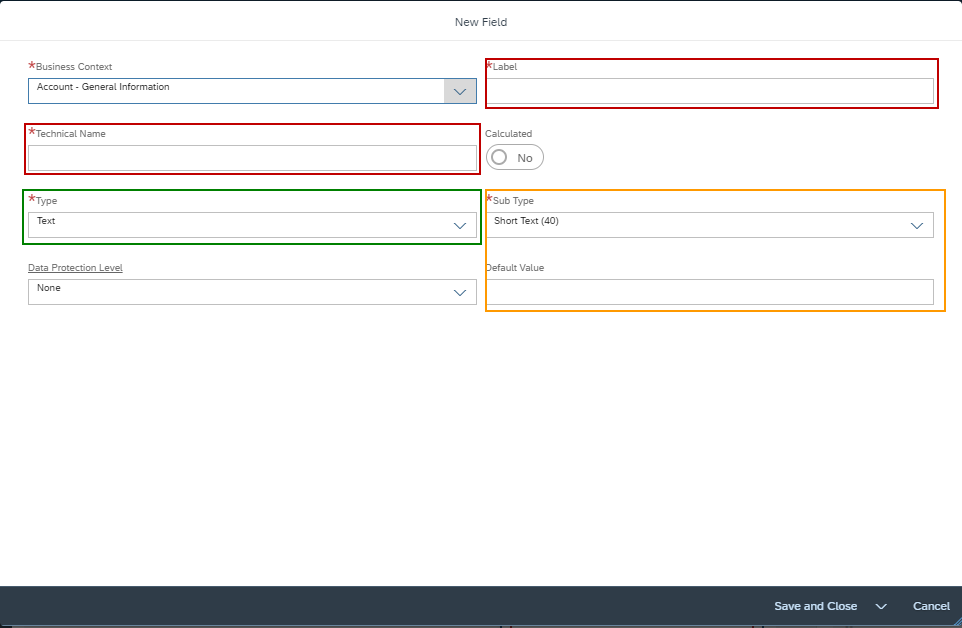
After that you can set the settings for the custom field. First give it a fitting name und Label, then a Technical Name. The Technical name will be important when working with the data workbench, because there it is the name of the field. For the technical name, just take the name of the field without any spaces and put a Z in front of it (e.g. ZTestField). This makes it easy to recognize the field as a custom one.
Regarding the Type, open the drop down list and you’ll have a variety of options to choose from here. All these types are pretty much self-explanatory and don’t require any deeper introduction. After selecting the type make sure to check optional fields, like the Sub Type for the Text and select a Default Value if needed.
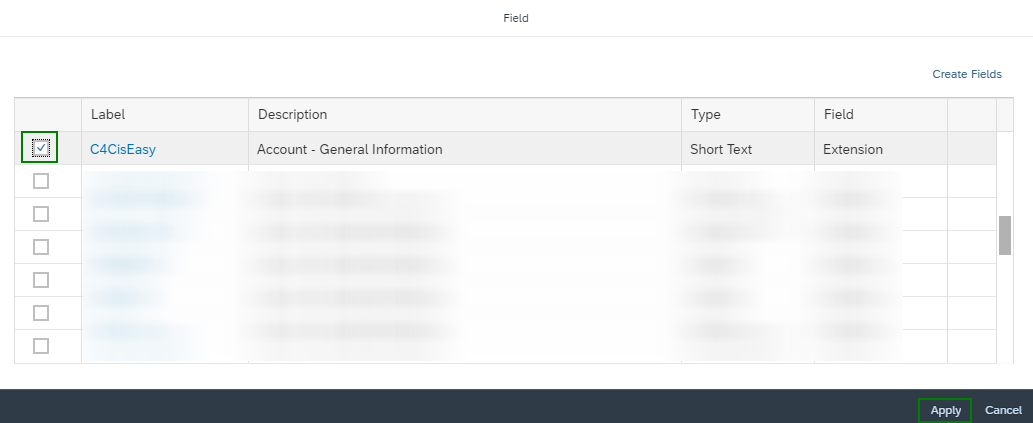
Once all the settings have been made, move forward by clicking Save and Close. It will take you back the screen before, where now the mark in the checkbox must be set and confirmed by selecting Apply.
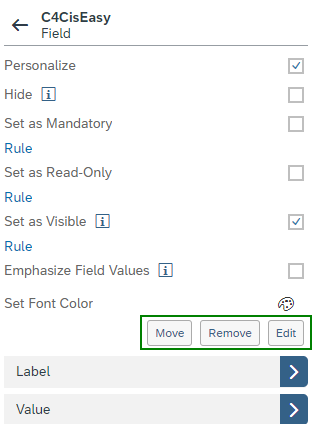
The custom field can now be found in the details section, from there it can be moved, removed or edited. By clicking Move a custom field can be moved from the details section into another area of the object and the Remove option is self-explanatory. Editing a custom field requires some explanation, by clicking the button you’ll navigate to the Edit field section.
In this screen you’ll not be able to edit straight away, for that the pen-icon in the top right has to be selected. Next to the pen-icon is the Delete-button, with which the custom field can be deleted. The main focus in this article here will be on how to add different languages to the field, making it available for reports and for the data workbench.
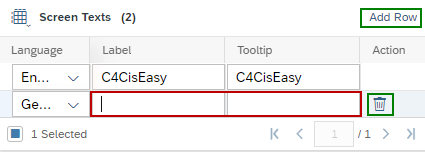
To add a new language stay in the General Settings and select Add Row. Choose the language in the first column, then type in the name of the field (in the other language) under Label and just copy that into the Tooltip-field. In case one of the rows has to be deleted, this can be done by using the bin-icon.
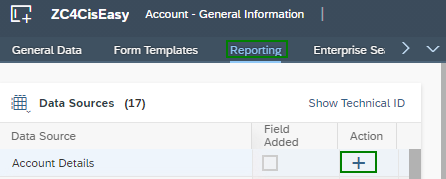
In the Reporting tab custom fields can be made available for reporting. Search for the data-source, in which the field is required and add it be clicking the Plus-icon.
To select a field for the data workbench navigate to the OData-Services tab. Here check for the area in which you are working, so if the custom field is created for customer accounts put the checkmark behind customer.
Save your changes by clicking the Save-button, where before was the pen-icon.
Do you need consulting from our experts?
The Customer Experience team at Camelot ITLab deals with exciting and challenging CRM related topics every day and serves a large portfolio of different customers from a wide range of industries. Trust in this collaboration and feel free to contact us at tlil@camelot-itlab.com.
Was this article helpful?
If you like our content we would highly appreciate your review on Trustpilot