Adaption - UI Rules
UI Rules can be very useful to create a few restrictions and gain more control over processes/ prevent mistakes as an admin.
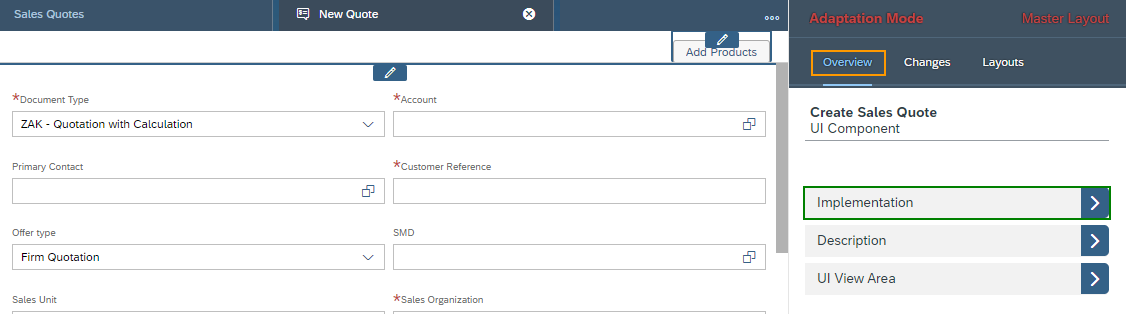
To get an overview, of how UI Rules work, a specific example will be created for this article. The logic behind it stays the same for other use cases. For this example the process of creating a sales quote will be used.
Before starting, navigate to the creation mask and open the master layout (User icon in the top right à start adaption). Next enter the Implementation area of the master layout. You’ll find it when navigating all the way back to the first screen of the overview section.
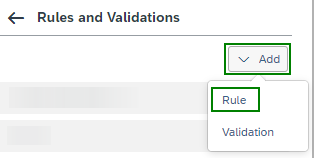
In the next screen only one option should be displayed, which has to be selected. From here on UI Rules can be created and edited. To create a new rule open the drop down menu under Add and select Rule.
Within the creation screen give the rule a fitting name and optional a description, but this isn’t a must. Then move on to write the rule itself, for that make yourself clear about which operators are required. In case more than one is required make sure to keep them in the right order. Start off with the primary operator, then the secondary and so on. Besides the operators, there are also Functions available (e.g. if-clause). They can be used alone or be combined with the operators, the syntax regarding the order stays the same. To get a better understanding check this example:
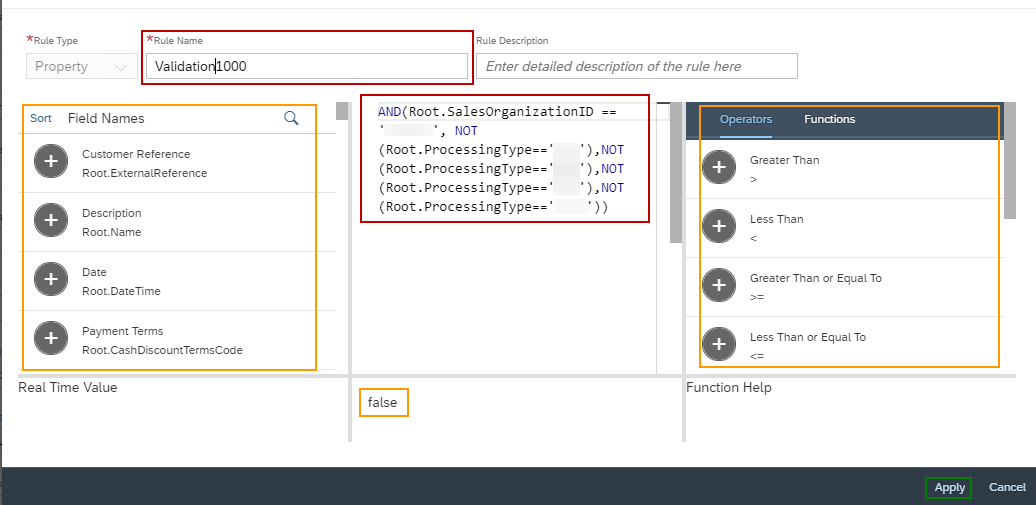
The primary operator here is the AND-operator. With its help a connection is created between the sales organization and the document type of the sales quote. NOT is a function and all NOT-functions shown here are secondary arguments within the AND-operator. Parts are separated from one another by comma. The double equal signs are used for the Equal-to operator and are used behind the field names, which can be selected from the list on the left. There is also a possibility to check, if the rule is working as planned. For that take a look at the true/false statement at the bottom center. Once the rule has been set up hit the Apply-button.
To edit an existing rule head back to the area where the Add-button is displayed. There will be the list with all existing UI Rules. Select the required one and click on the Edit-button.
Creating rules may require some practice since it’s easy to make mistakes, because of the syntax. If you have never done this before first create a few very simple ones, maybe even some without any operators or functions and always check the true or false statement to check if everything worked out as planned. Once you have understood the structure, it will become fairly easy and you can create complex UI Rules in a short amount of time.
Do you need consulting from our experts?
The Customer Experience team at Camelot ITLab deals with exciting and challenging CRM related topics every day and serves a large portfolio of different customers from a wide range of industries. Trust in this collaboration and feel free to contact us at tlil@camelot-itlab.com.
Was this article helpful?
If you like our content we would highly appreciate your review on Trustpilot
#SAP C4C #SAP Cloud 4 Customer #Cloud 4 Customer #Cloud for Customer #Adaption #Rules #UI #UIRules #Creation #Editing #Administrator