Transport Managementfor Workflow Implementation
A new workflow should always be well tested before it will be transported in a production system. This article helps you to understand how to transfer a workflow after successfully testing, into your productive tenant.
Navigation for Transport Management
Since workflow implementation should never be done in productive client for testing reasons, you will find Transport Management of workflows from test to productive client very useful. So let’s step right into it.
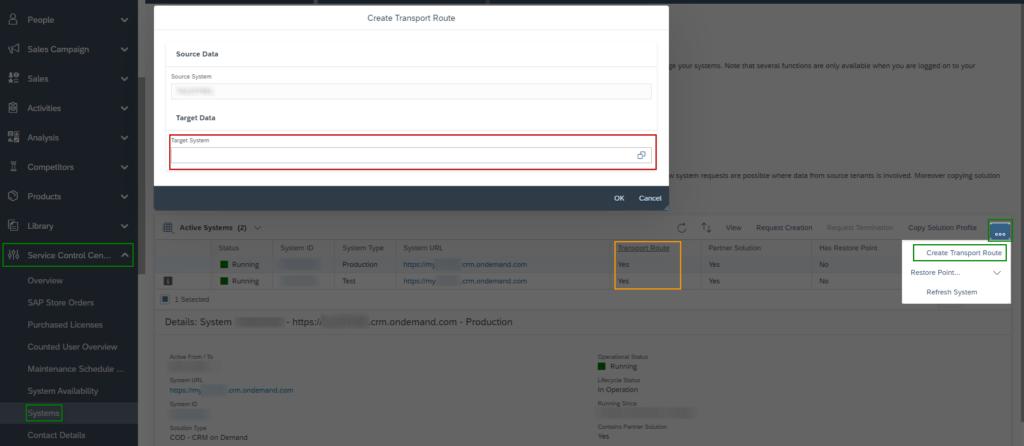
But before we can start make sure that both system are active under Service Control Center. Navigate into Systems and check if Transport Route is for at least two system set to Yes. If not click on …-Icon and then on Create Transport Route. Here you can select a Target System for Transport Management.
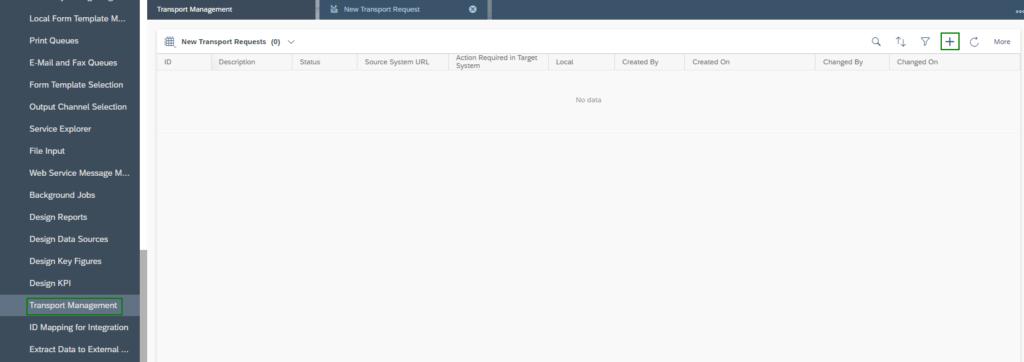
After that we are ready to go. Navigate via Administrator to Transport Management. Click on the +-Icon and fill in Description and Note of this specific Transport Request.
Confirm the new Transport Request with Save and Open.
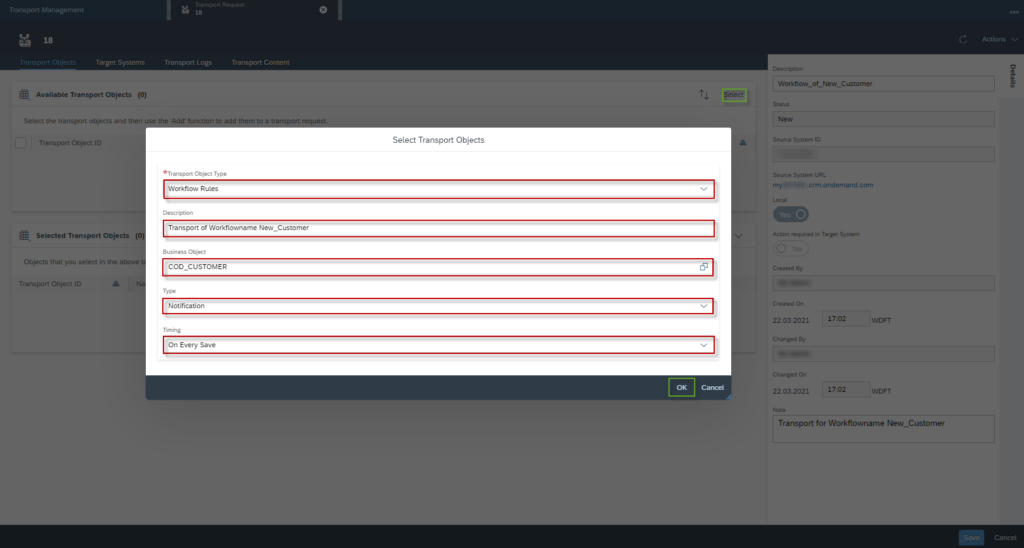
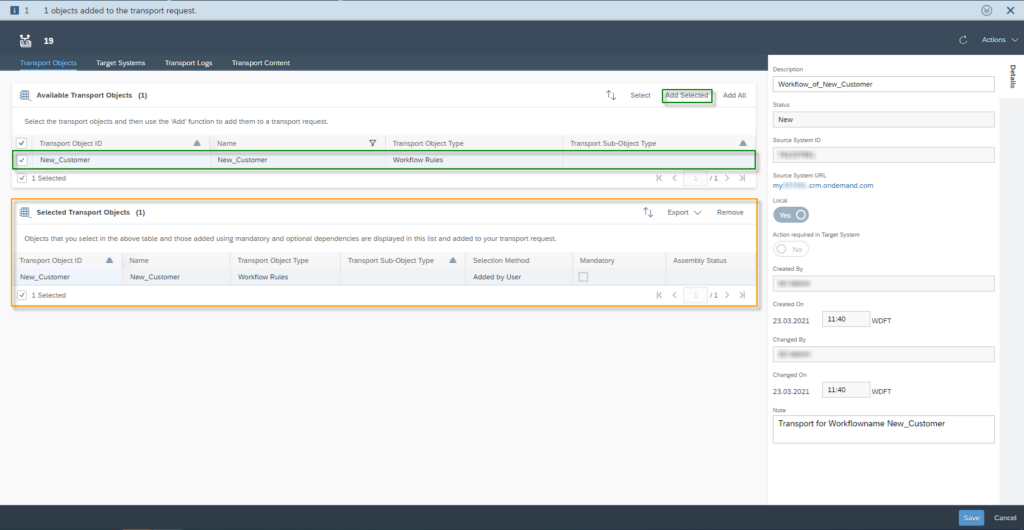
Select under Available Transport Objects the Transport Object Type – in our case Workflow. After that you can add the Description of the Transport Job, the Business Object the Workflow applies to – it is the same as in the workflow itself – the Type and the Timing – also both the same as in the workflow itself. Confirm with OK-Button. Note that Business Object, Type and Timing are kind of a selection of your workflows. If you leave these fields empty more workflows will be selected under Available Transport Objects.
After loading a bit our goal is to bring Available Transport Objects to Selected Transport Objects. In Our Case this will be the Workflow New_Customer. Clicking on Add Selected the system will move them from available to selected. Confirm the change with Save.
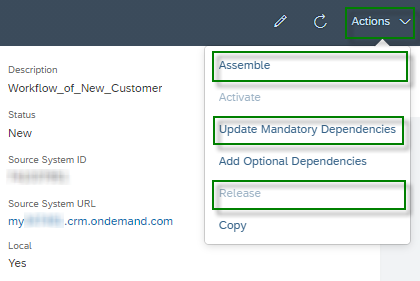
Now we will Update Mandatory Dependencies under Actions. After that we will Assemble the Transport Request. The Status will be changed from New to Assembly Started. After Refreshing the status will change again to Assembled.
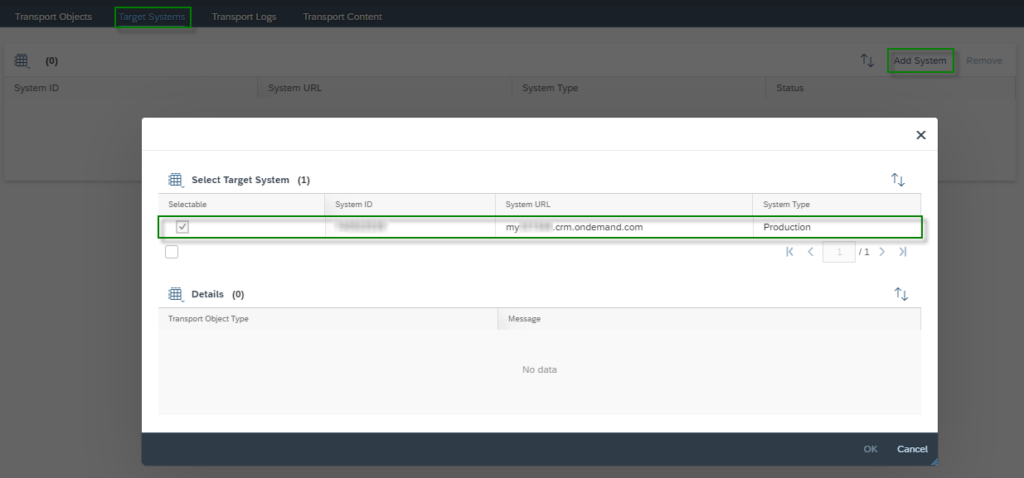
Before you Release the transport request under Actions, make sure that you select in Tab Target System the correct system to transport the objects to. Confirm with OK and then with Save.
After the release switch to the Target System to Transport Management via Adminstrator.
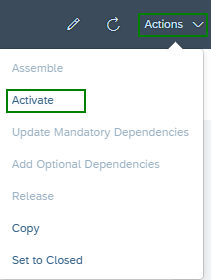
Click on the hyperlink of the Description and Activate the Transport Request under Actions. The Status will be changed from Imported to Activation Started. After refreshing the status will change again to Activated.
Please note that all new workflows are imported with the status Inactive. So as a last step you have to go to Workflow Rules via Adminstrator and activate the Workflow.
The Customer Experience team at Camelot ITLab deals with exciting and challenging CRM related topics every day and serves a large portfolio of different customers from a wide range of industries. Trust in this collaboration and feel free to contact us at tlil@camelot-itlab.com.
Was this article helpful?
If you like our content we would highly appreciate your review on Trustpilot

