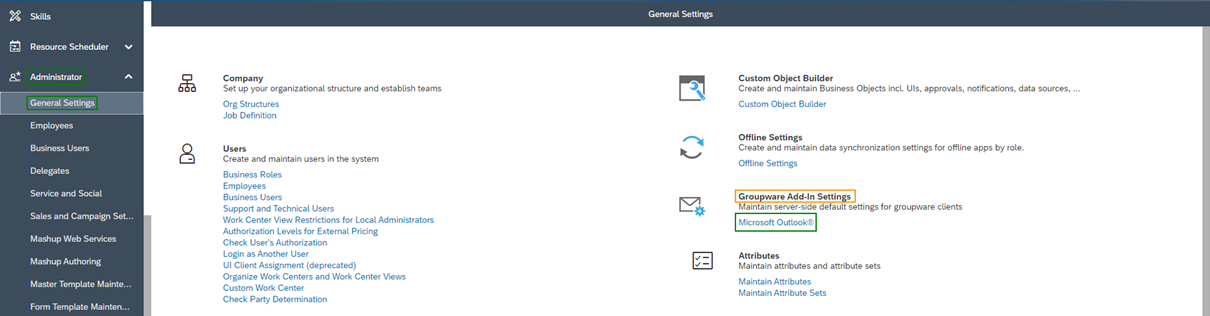
All settings can be found in the Work Center Administrator, in the Work Center View GeneralSettings. In the GroupwareAdd-InSettings tile, click on Microsoft Outlook®. At this point it is recommended to read the following Chapters first to understand the user perspective with the Microsoft Outlook® Add-In before you go into the details how to administrate them:
Understand the Basics of Microsoft Outlook® Add-In
Work with Accounts and Contact Persons
Work with Activities
The setting options are separated into the three areas General Settings, Side Panel Options and Notifications/Errors, which you will find in the individual tabs. These are explained in detail in the following chapters.
In general, whenever you change a setting as an Administrator, the Business Users must reset the settings in their Add‑In, and it’s recommended to restart Microsoft Outlook®. To do so, click in the SAP Sales Cloud Ribbon on Settings and then in the appearing window on Reset. You can announce a change via information e-mail in your company.
1. General Settings
In this tab you will find several different sections that contain setting options belonging to this topic. You can activate or deactivate these via an Indicator.
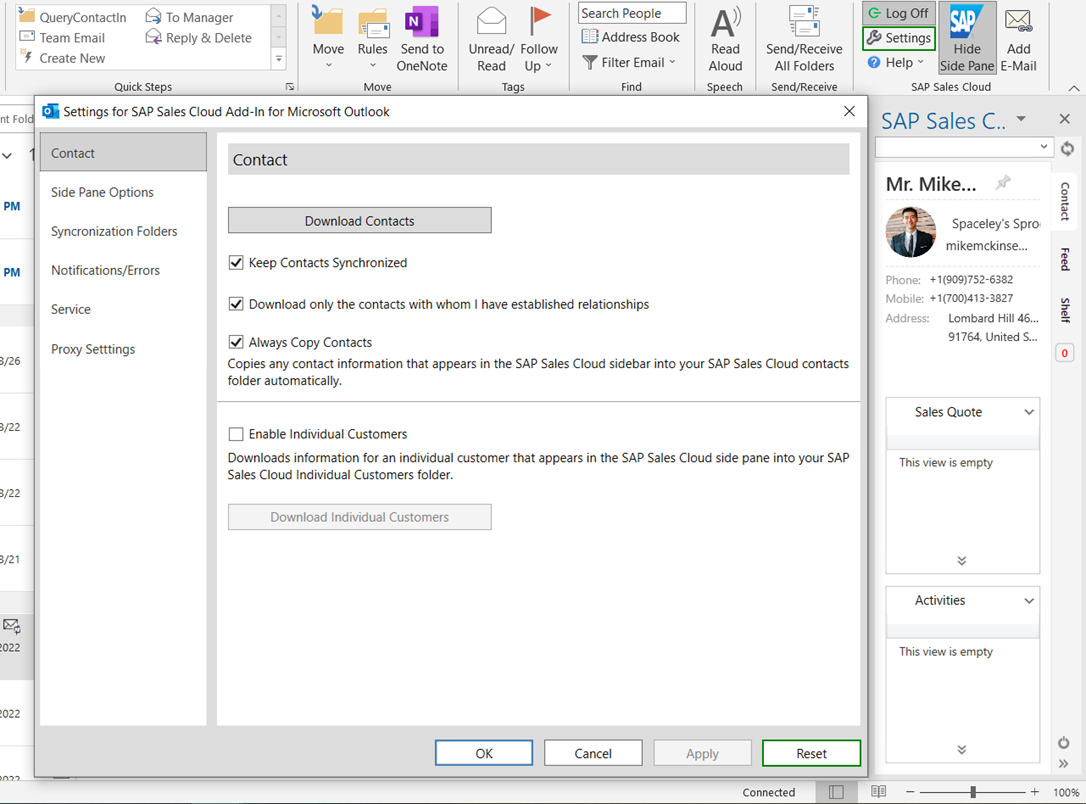
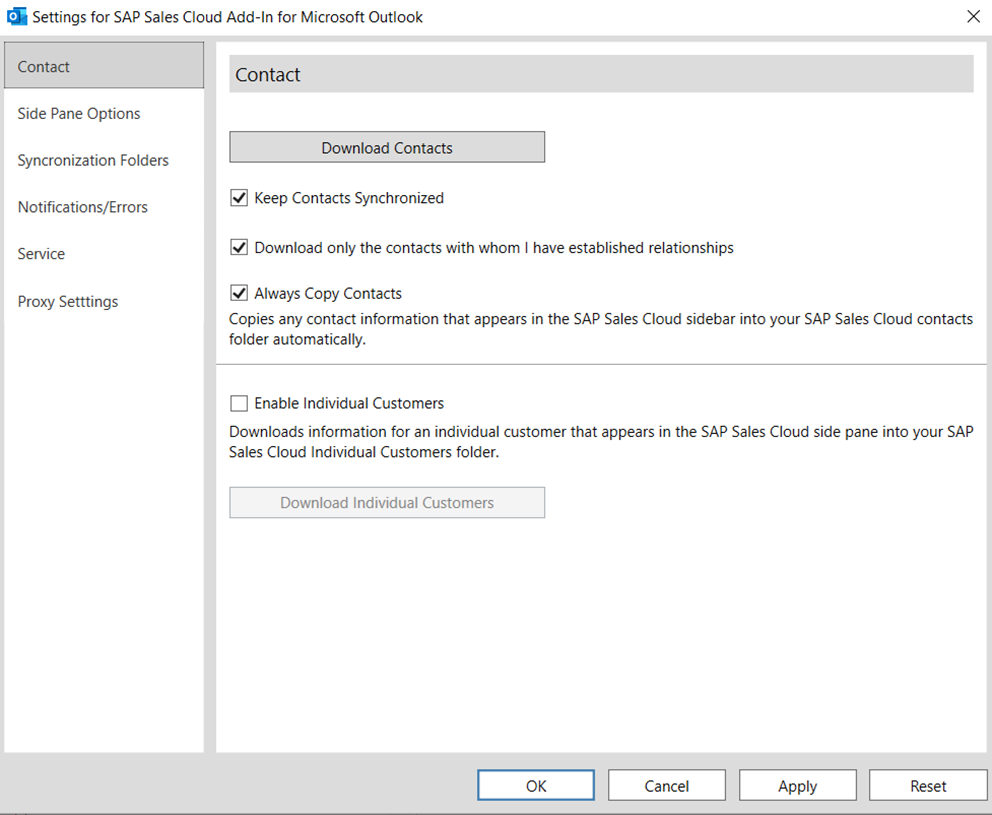
Section: Download Contacts
Setting Option: Download Contacts
The Download Contacts button initially downloads the Contact Persons from SAP Sales Cloud to your Outlook Application. This is a one-time download.
Setting Option: Keep contacts synchronized
Your contacts will be automatically updated between the two systems if you enable the Keep Contacts Synchronized option
Setting Option: Only download contacts related to me
This option synchronizes only contacts with whom you have a relationship in SAP Sales Cloud. This is done in the Relationship tab of each contact.
Setting Option: Always copy contacts
Using the Side Bar, the add-in shows you related data based on the contact found for the sender email address from SAP Sales Cloud. If you want to download these contacts automatically, enable the Always Copy Contacts function. Alternatively, you can download this manually via a + Icon in the side bar. The following figure shows the setting options for Contact Persons of the Microsoft Outlook® Add-In.
Setting Option: (Admin only) Require that users associate an account when they create or change a contact
The synchronisation of contact persons into the SAP Sales Cloud application is only allowed if you have linked them to a customer. Otherwise, the Submit button in the synchronisation window is greyed out.
It is not allowed to synchronise a contact person without reference to an Account. The Submit button is greyed out
It is allowed to synchronise a contact person without reference to an Account
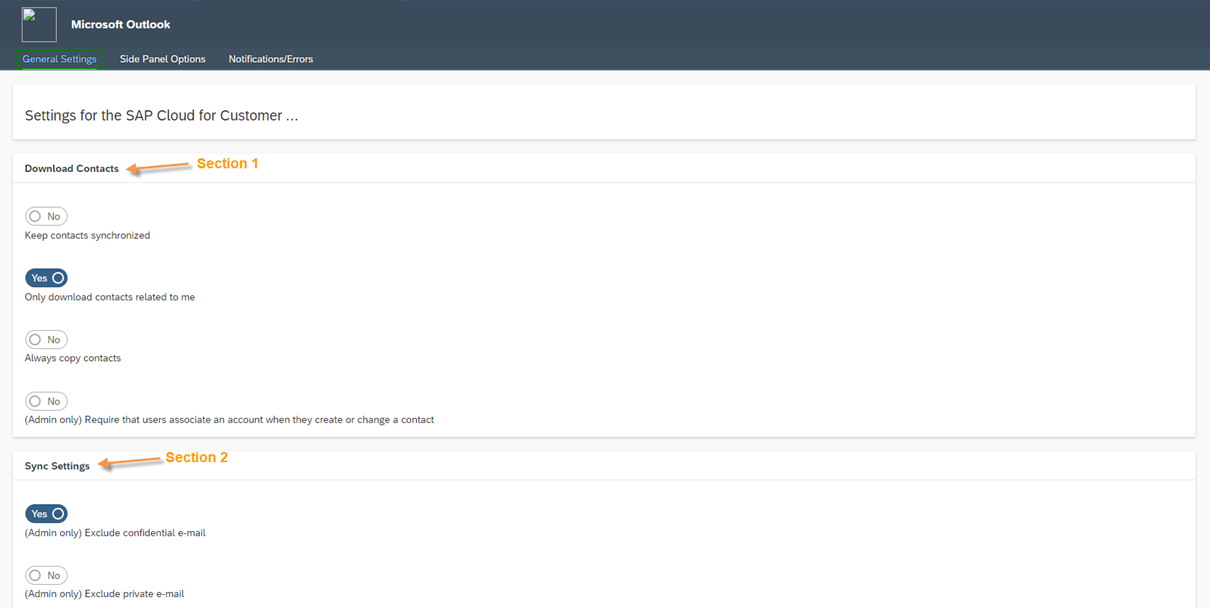
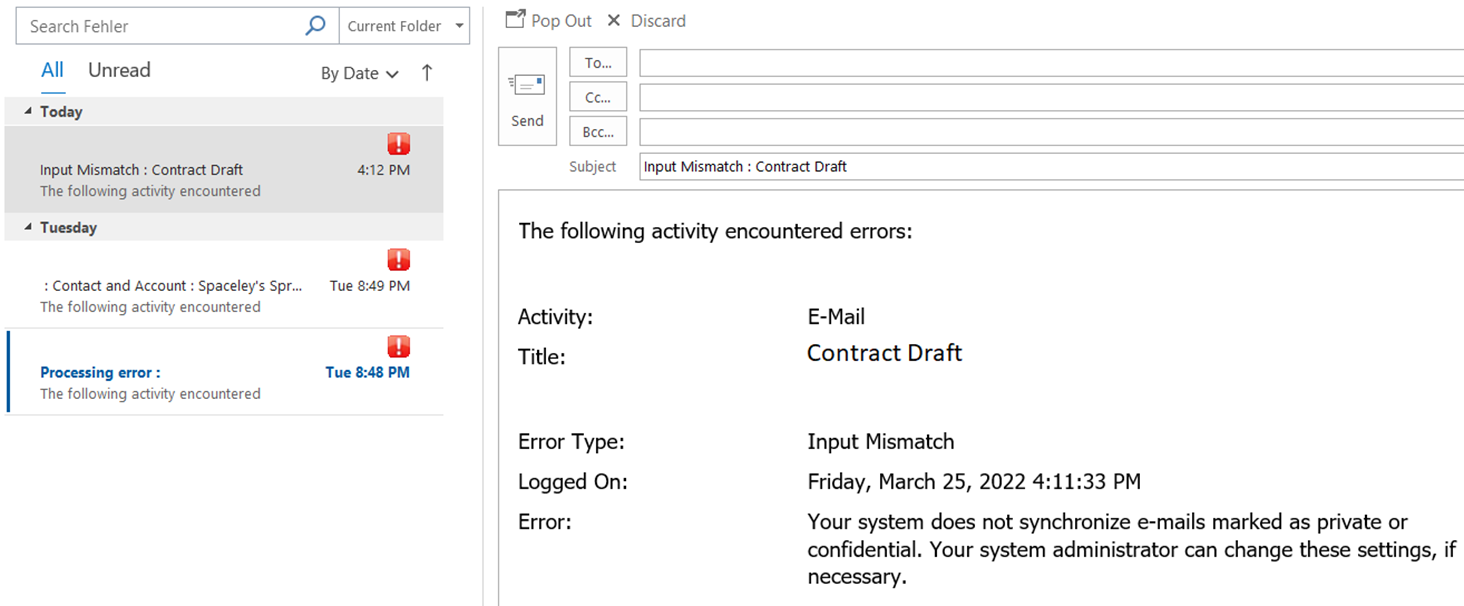
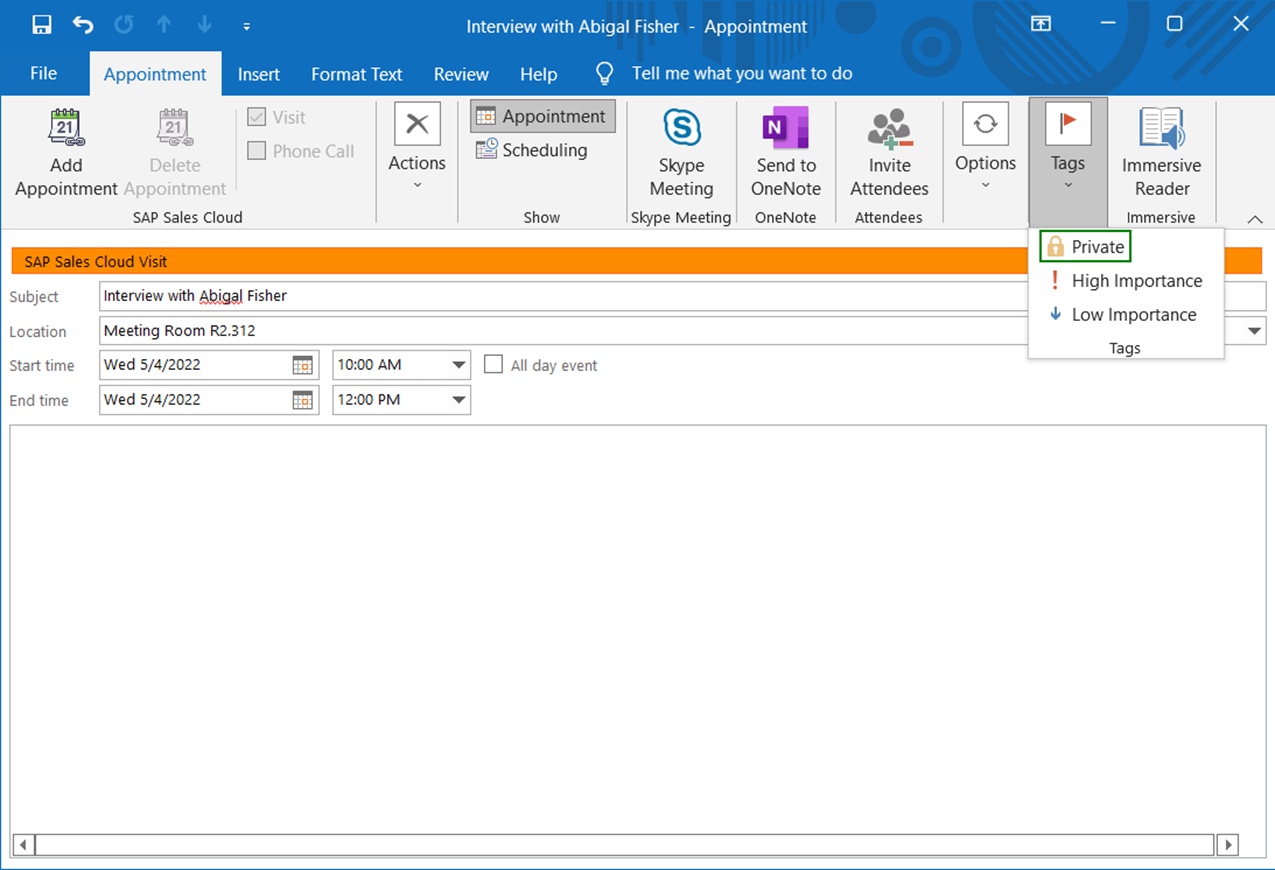
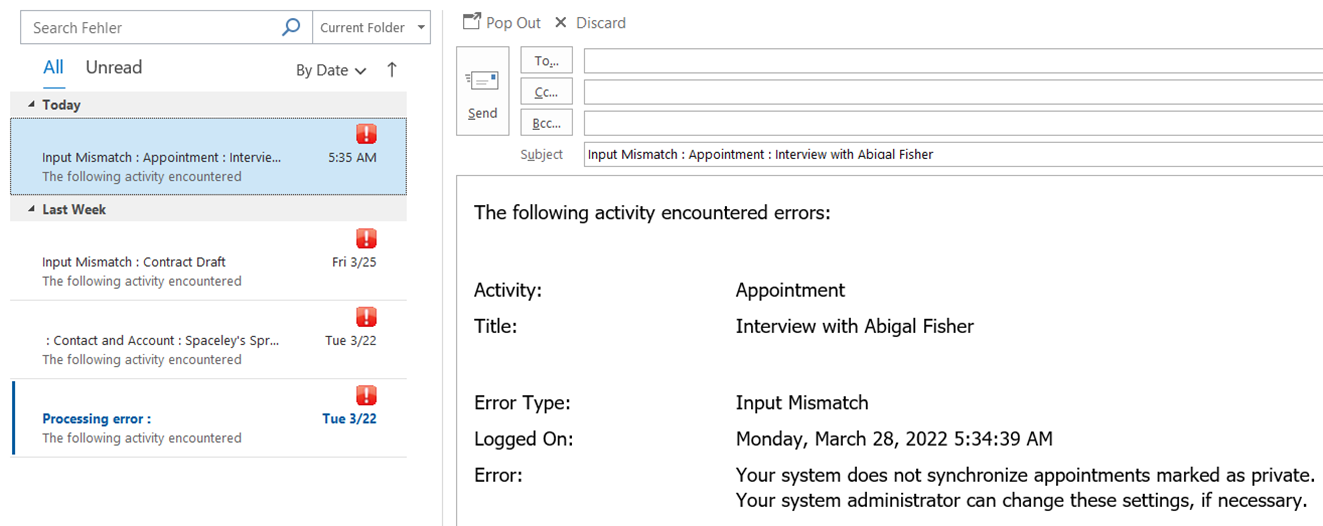
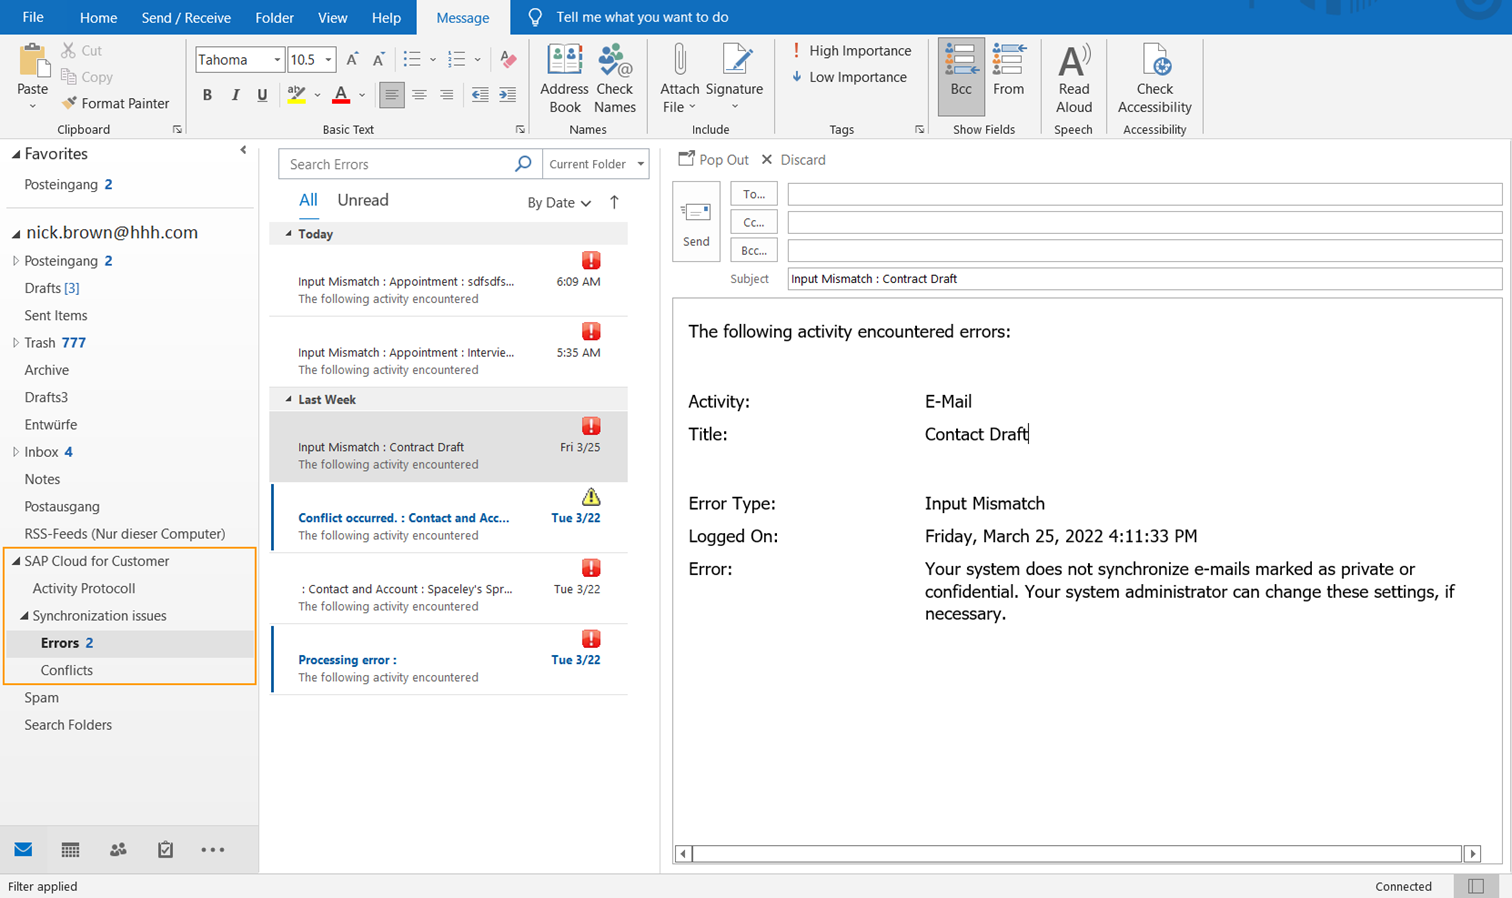
By default, privately marked appointments are not synchronised in the SAP Sales Cloud. You can change this setting with this Indicator, so that this is also possible.
When trying to synchronize such Appointments, you will receive following Error Message:
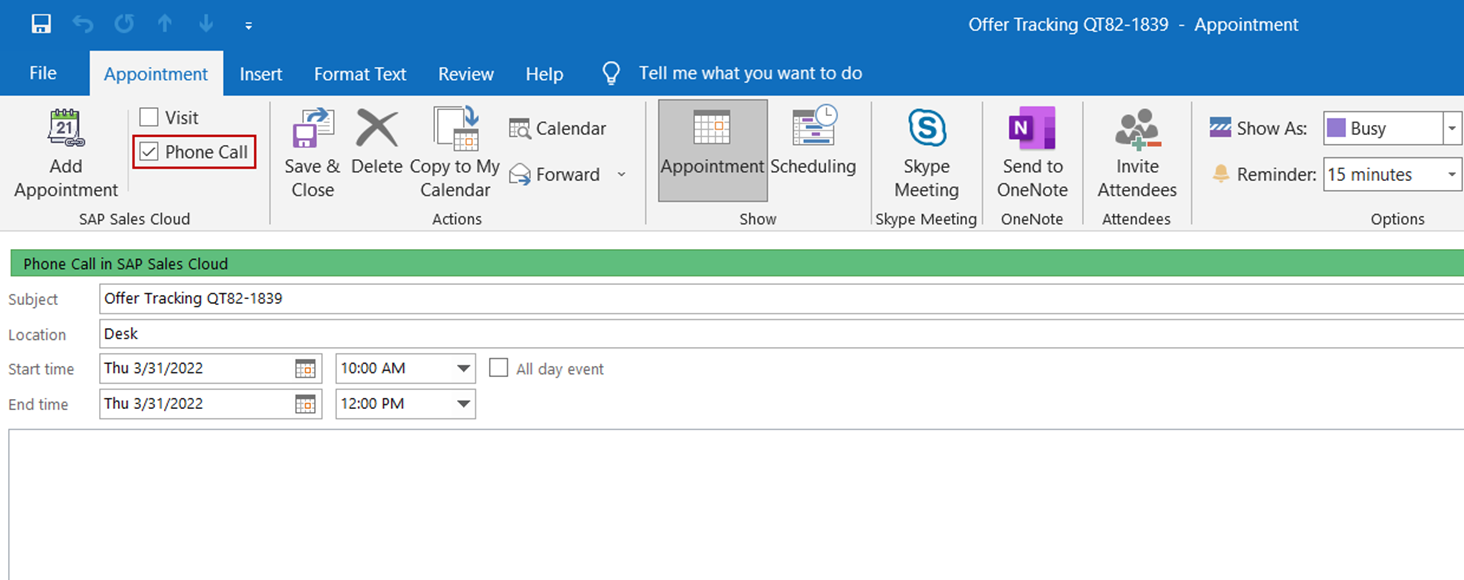
Setting Option: Enable download of Phone Calls
By default, this property is deactivated, which means that the Phone Call checkbox is greyed out in Microsoft Outlook® when creating appointment. Activate this property to be able to synchronise phone calls.
This allows you to control that the settings by the administrator are always restored to the Business Users Microsoft Outlook® Add-In by default as soon as they reset their settings. However, users can subsequently adjust this setting individually later again.
Section: Activities
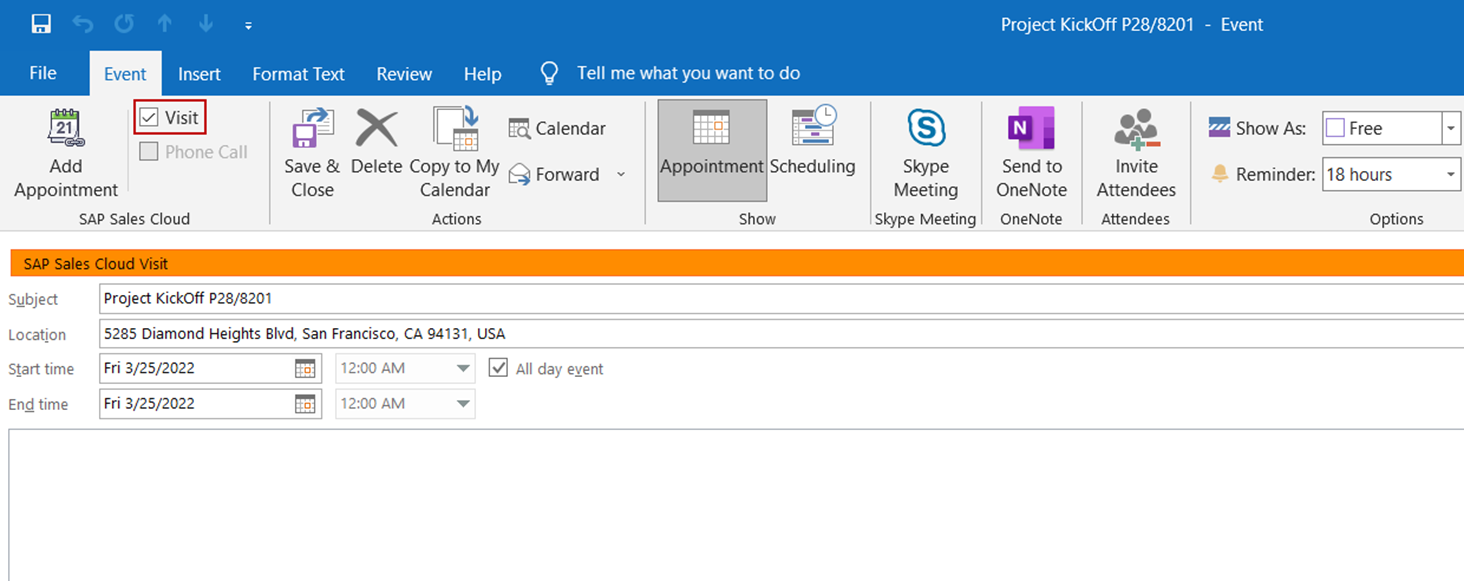
Setting Option: Create appointments in Microsoft Outlook® as visits by default (users can change as necessary)
When creating an appointment in your Microsoft Outlook® application, you can define whether this appointment should be of the type appointment, visit or phone call. You control this by activating the respective check box. If neither a phone call nor a visit is selected, it’s synchronised as an appointment. With this setting, you tick the Visit checkbox by default.
2. Side Panel Options
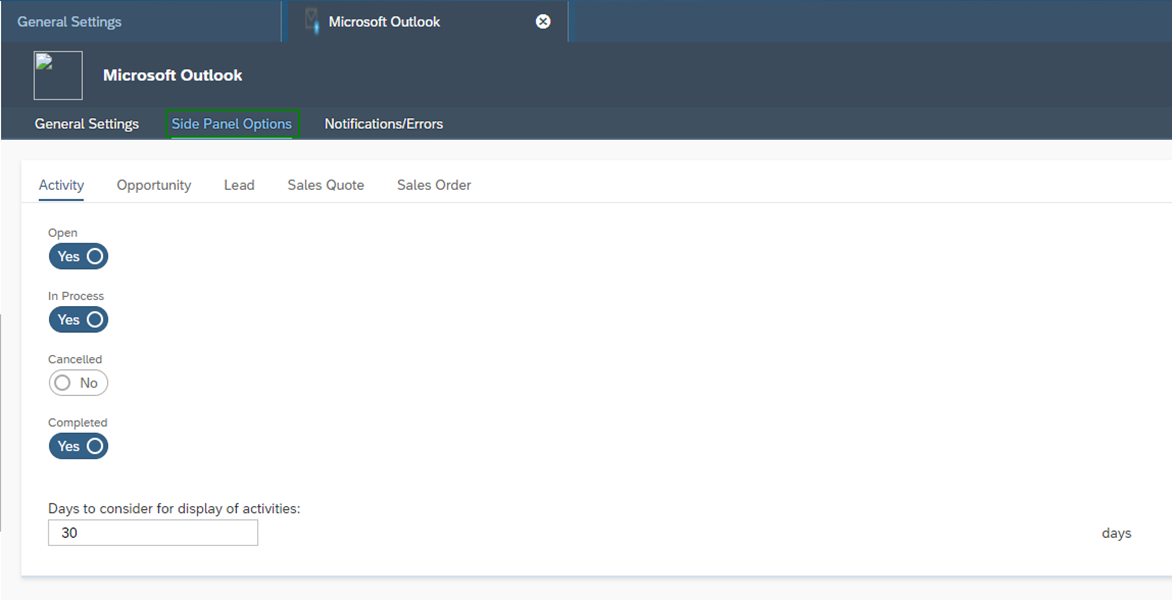
Under the Side Panel Options tab, you can make settings for which Business Objects with defined attributes are displayed to the business users in the side pane. You can make selections for the objects Activity, Opportunity, Lead, Sales Quote and Sales Order. The figure below shows you an example from the Microsoft Outlook® application. You will always find two different areas – where the Business User can freely define the Business Objects – in the Side Pane. Shown here for the contact person Mike McKisney, you see the Areas Sales Quote and Activities.
In the example below, you can see that the CanceledActivities are not selected, therefor they are not displayed in the Side Pane. You can also specify the maximum age of the displayed objects. In the example shown below, only activities created 30 days ago or less are displayed. The age always refers to the creation date of the Business Object.
3. Notifications/Errors
After Synchronisation settings can be made in the Notifications/Erros tab. It should always be important for business users to receive an immediate message about the status of the synchronisation. This way, they can immediately ensure that the process is working smoothly or even see errors immediately. The following setting options are available:
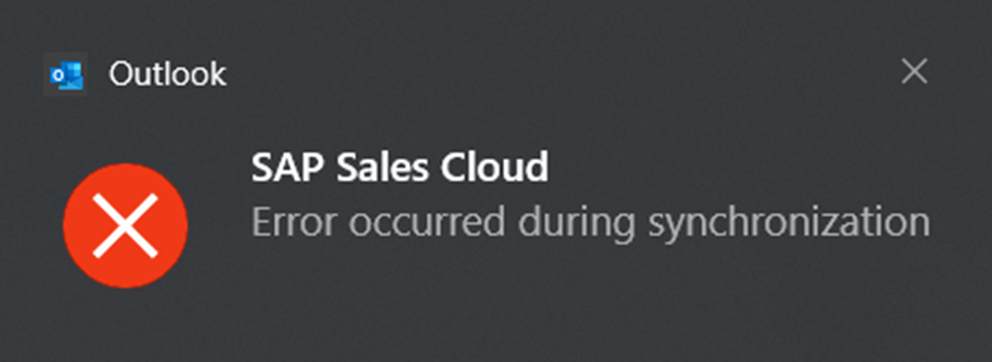
Setting Option: Tell me when something goes wrong
If there are errors during synchronisation, you can immediately receive a pop-up displaying this information. Click on the pop-up to view the corresponding log.
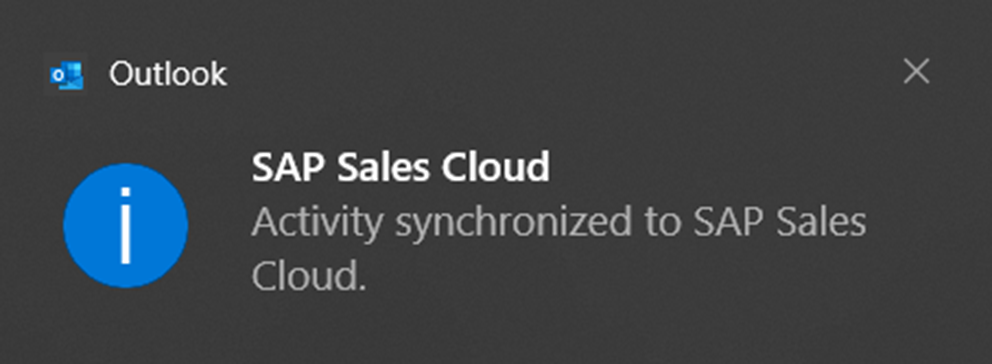
Setting Option: Tell me when something goes right
If the synchronisation was successful, a pop-up will appear in your Microsoft Outlook® application, showing you that the synchronisation was successful. The following shows that an Activity was successfully synchronized.
Setting Option: Save synchronization errors and conflicts
As soon as you have installed the client-side Microsoft Outlook® Add-In for the SAP Sales Cloud, folders for synchronisation are also created in your e-mail folder structure. If you allow errors and conflicts to be saved, the logs are stored here as an e-mail draft. This means that whenever there is a problem with synchronisation, you can view the log here and identify the cause of the error.
Do you need consulting from our experts?
The Customer Experience team at Camelot ITLab deals with exciting and challenging CRM related topics every day and serves a large portfolio of different customers from a wide range of industries. Trust in this collaboration and feel free to contact us at tlil@camelot-itlab.com.
Was this article helpful?
If you like our content we would highly appreciate your review on Trustpilot