Search
Close this search box.

Creating and Adjusting Territories

Territory Management
Creating and Adjusting Territories

This article explains you how to create and adjust a Territory in SAP Sales Cloud

Navigation for Chapter Territory Management

For Creating and Adjusting Territories go to Work Center Sales and then click on Work Center View Territories. Here you will find a structured and hierarchical listing of all Territories. As an example, here you can see the mapping of the hierarchy levels, which was explained in the chapter before – which starts from the Division America up to the Sub-District Alabama-West. At the same time, you see here the Territory Employee Responsible for the territories, the Territory Level and the Parent Territory.

2.1. Creating

To create a territory click the New button in the upper right corner. Here you will see following three options:

New Territory  –  Will open a blank form, where you can enter the Name, Parent Territory and the Owner.

New SubTerritory  –  You can select any Territory from the table and then click on New  New SubTerritory. The same form will open as when you click on New Territory, except that the Parent Territory is filled out automatically based on your selection.

Territories from Microsoft Excel®  –  You can create multiple Territories at once using Microsoft Excel®, which will be explained later.

So, when creating, specify the Name of the Territory in the first step, as already described. Then select the Parent Territory – on the base of which the Territory Level will be derived. Finally, you can already specify the Owner of the territory here. Then confirm your entries with Save and Open.

You can then define additional party roles in the territory. To do this, click on the Add button and select the Party Role and then the corresponding employee Name. Here you will find the roles – which you have created – again. Confirm with Save.

2.2. Adjusting

To adjust a Territory click on the Territory Name in the tabular overview of the Work Center View Territories. In the Details you have the possibility to change the Name and the Parent Territory. The Hierarchy Level will be adjusted automatically with respect to the parent. If you want to remove roles, click on the Trash Can Icon  in the Action column. You can add new roles by clicking on the Add button. If you want to change the employee of a role, you must first remove this entry and then add a new one. In the Changes tab you will find an overview of all changes to this area.

In the tab Accounts you will find an overview of all Accounts which are assigned to this Territory. Note that you can’t simply add accounts here, because Accounts will be assigned to the correct territory in the Object itself, via Realignment Rules or by using the Account Mapping


2.3. Using Microsoft Excel® for mass data entry

You can use Microsoft Excel® to load multiple entries into SAP Sales Cloud. Here it is much easier and faster to prepare the data accordingly, so that in the end you only have to load the template into the system. To use this function, you need the Microsoft Excel® Add In, which you can download under your User Menu  and then in the Download area. The following functions are available with Microsoft Excel®:

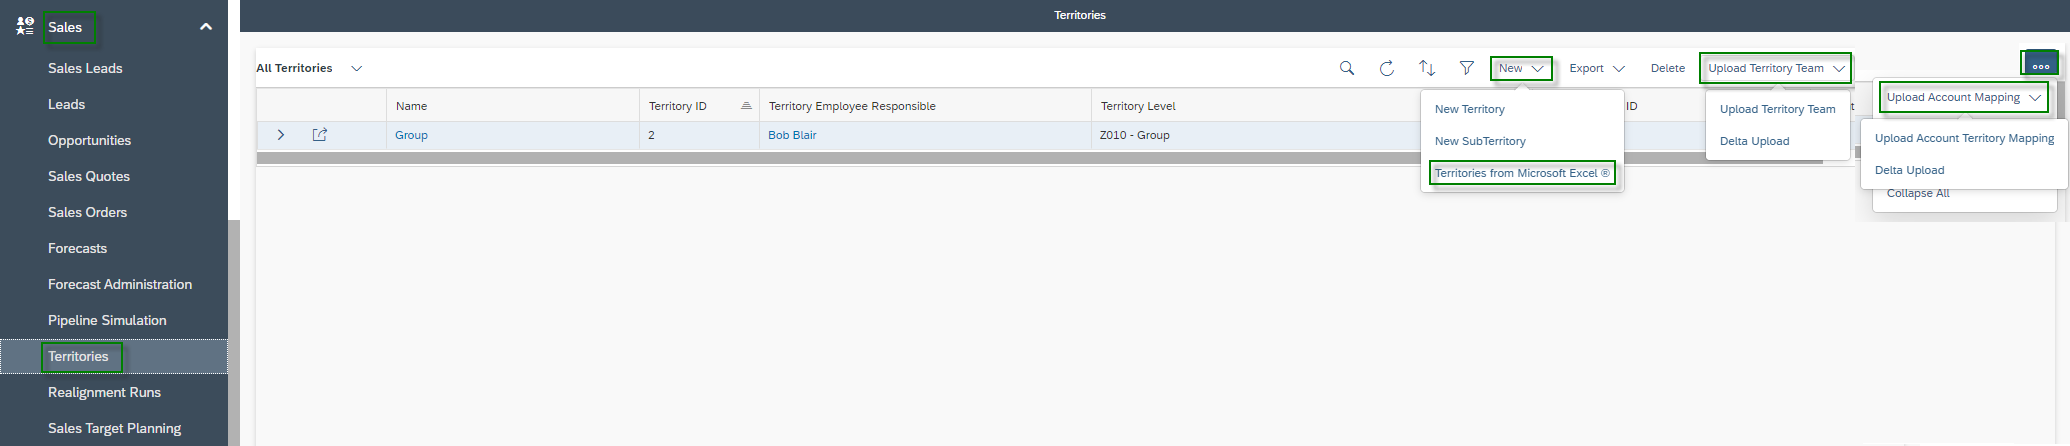
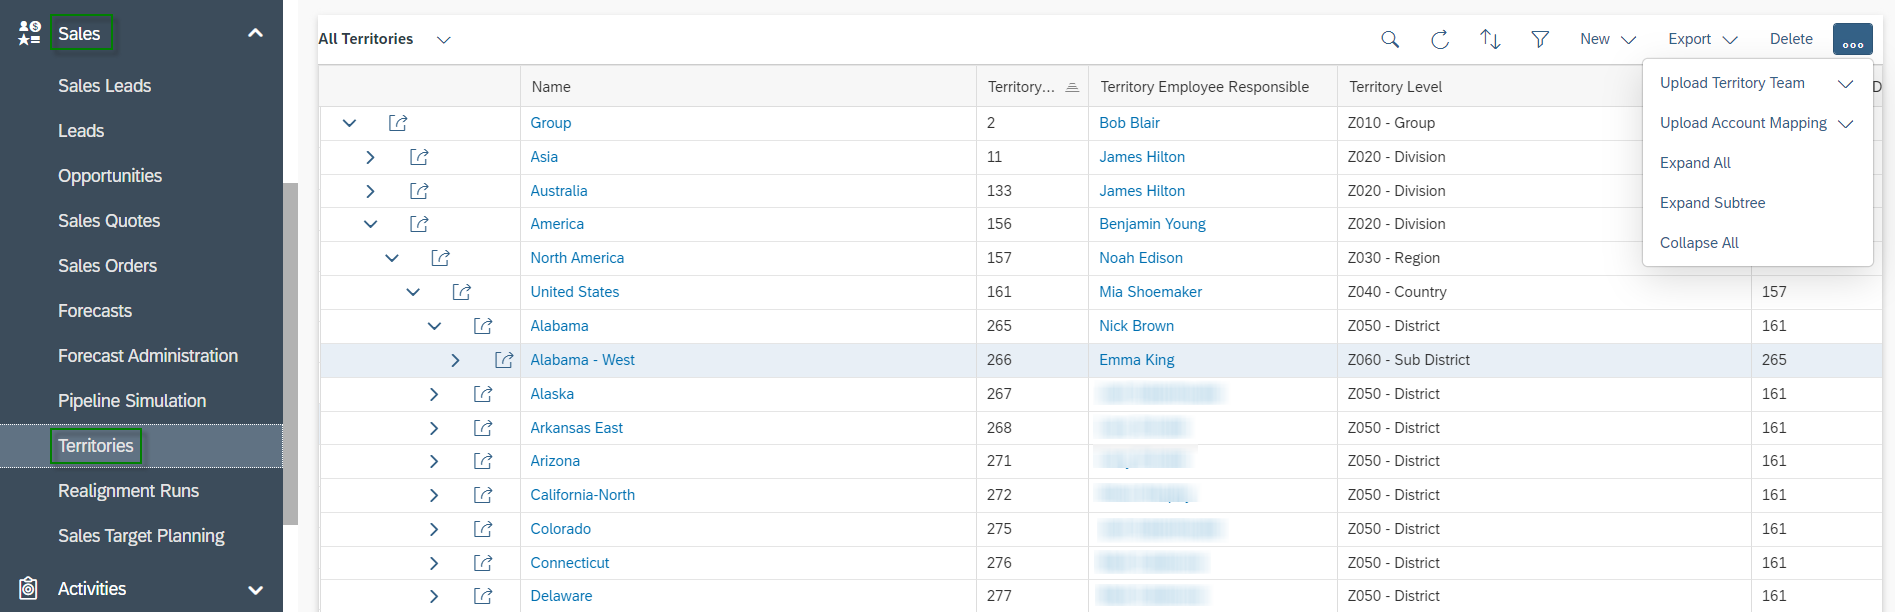
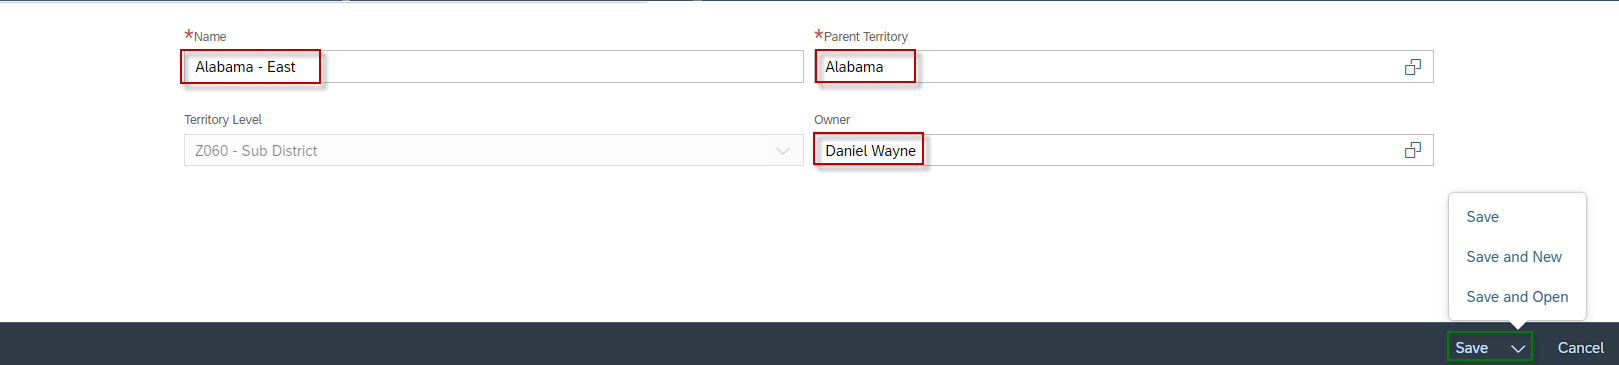
New  –  Under Territories from Microsoft Excel® you can create new territories. The existing ones will not be overwritten or deleted.

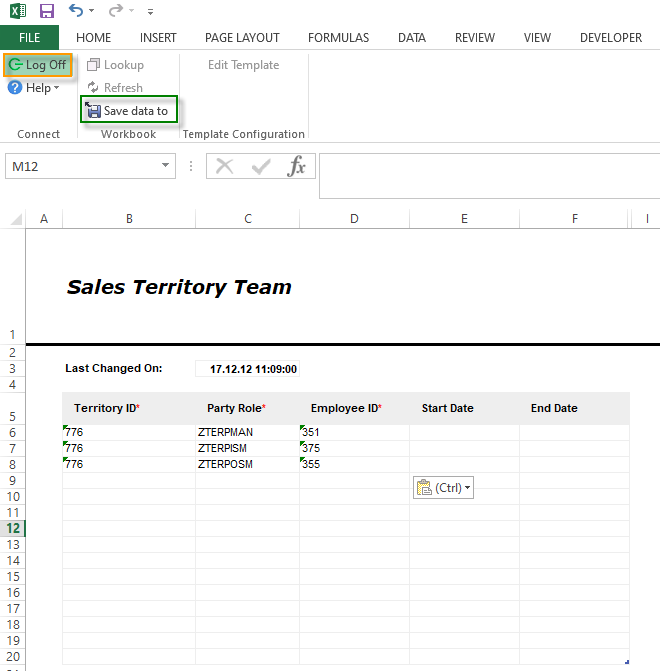
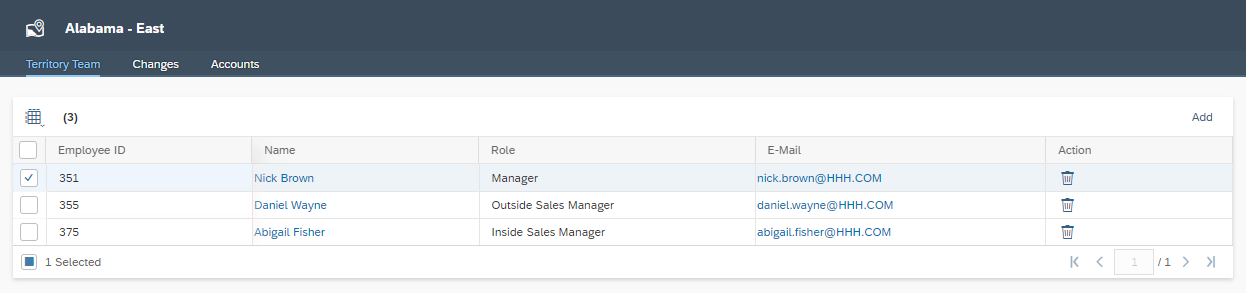
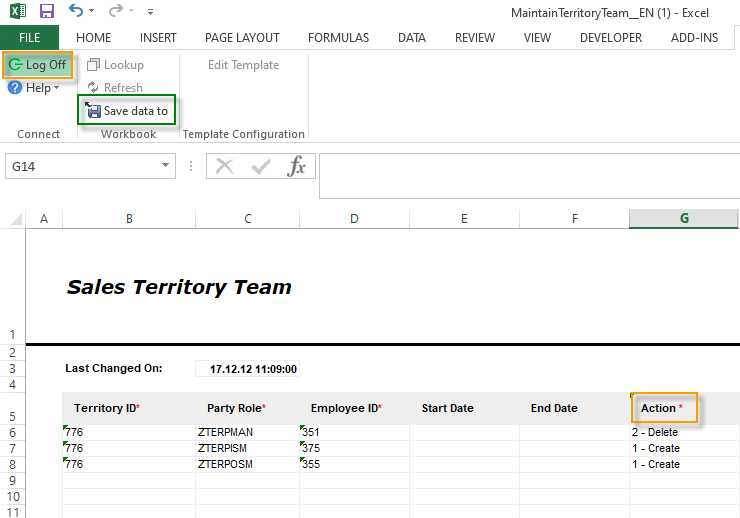
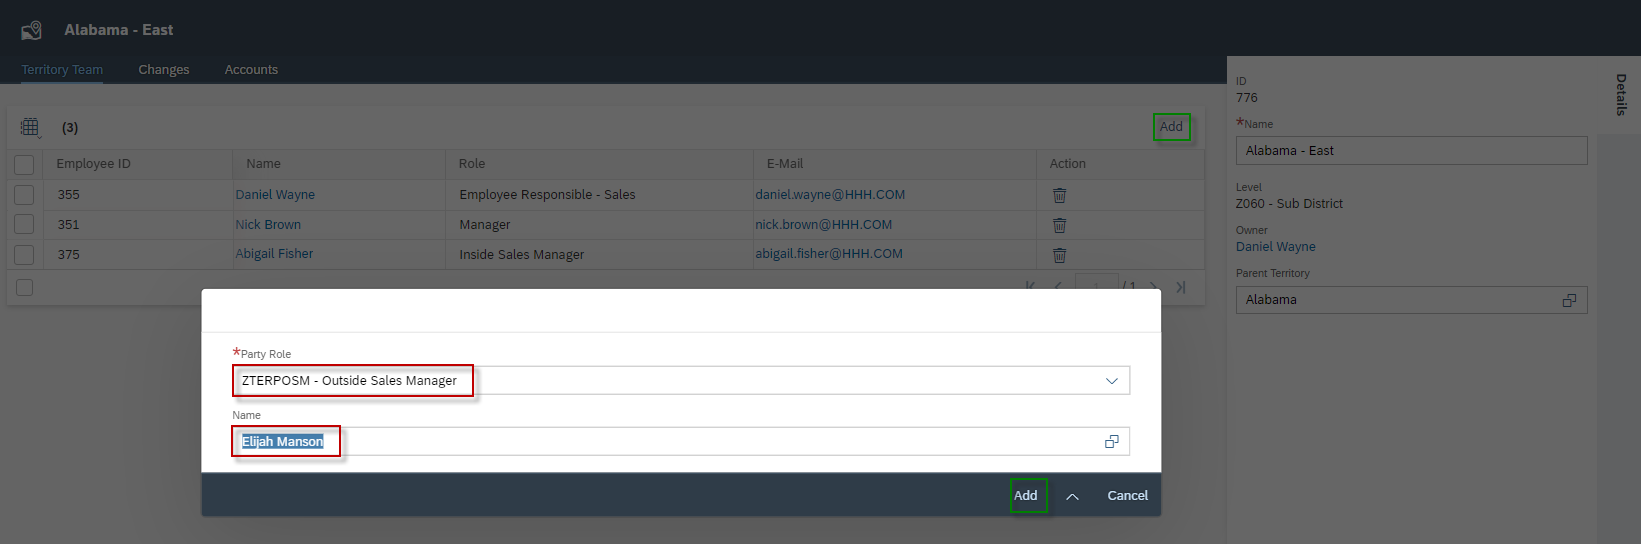
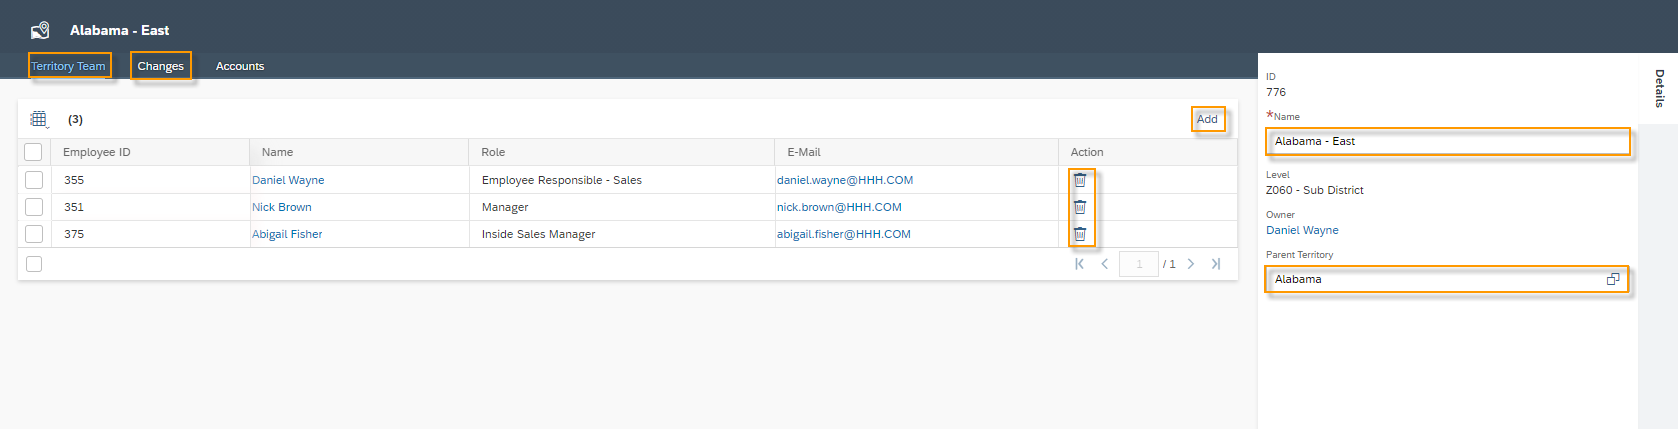
Upload Territory Team   –   Under Territory Team you can either Upload Territory Team – which will overwrite existing entries – or Delta Upload – which will add new entries and/or delete existing entries.

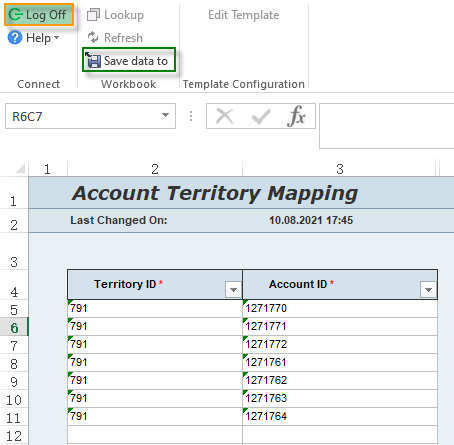
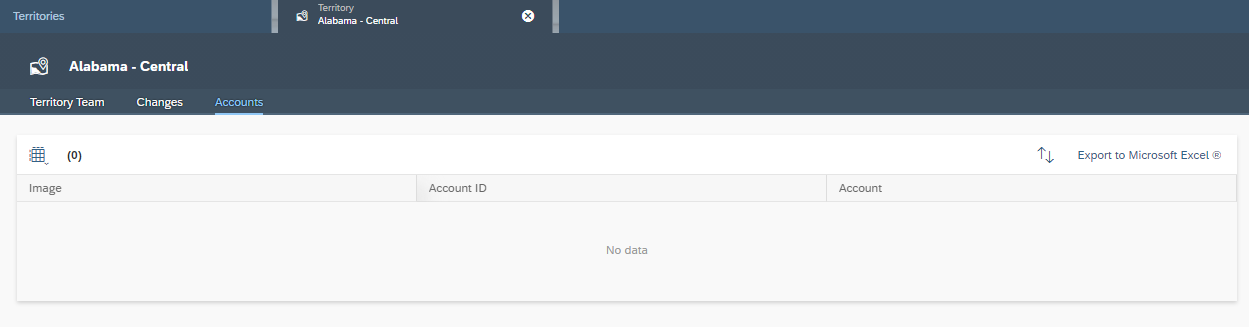
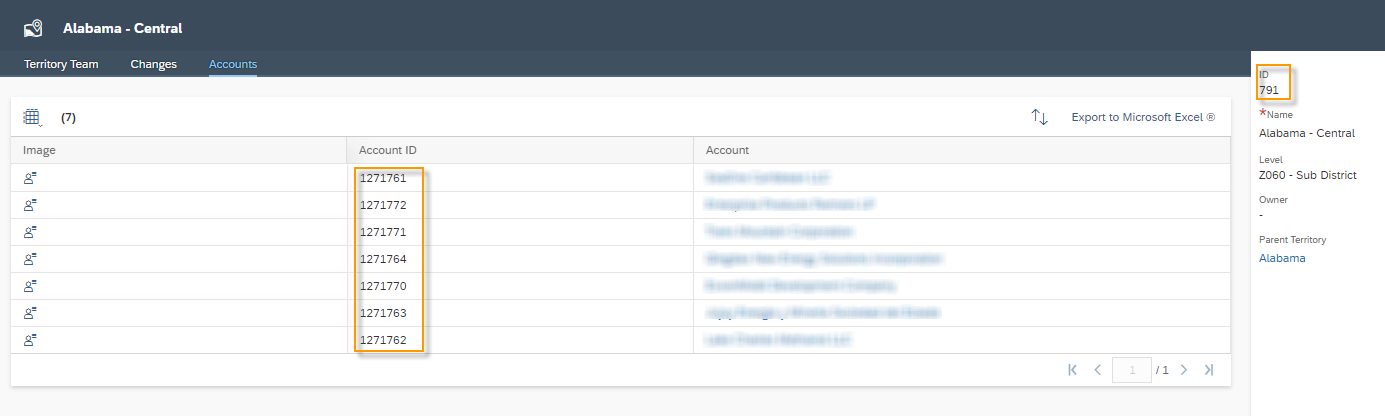
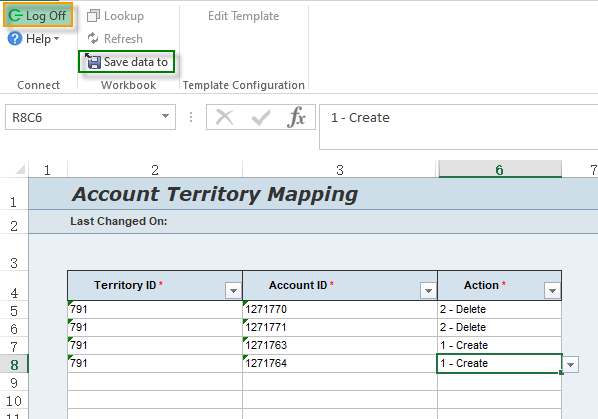
More  –  Under the More Button you can also Upload Account Territory Mapping – which will overwrite existing entries – or Delta Upload – which will add new entries and/or delete existing ones. With the mapping you are able to assign Accounts to specific Territories.

2.3.1. New Territories

Click the New button and then Territories from Microsoft Excel®. In the Import from Microsoft Excel® popup you can select the Language in which you want to download the template. By default, the language with which you are logged into the SAP Sales Cloud is always entered here. Then click on Download.

Now open the downloaded template and fill out the columns. In the Sales Territory ID column, add the ID of territories consecutively and in ascending order. Find out the highest used ID in the System and increase this ID by 1. With this number you can start in this Template. For example the last Territory you added was Alabama ‑ East with ID 776. Then you increase the ID 776 by 1, which is 777. With this you can start filling out the template. In the column Territory Name you define the Name of the Territory. Node that this Territory will be named in any system language the same! In the last two steps define the Parent Territory ID and the Employee Responsible ID. Go to Work Center Administrator and then click on Work Center View Employee to search for the correct Employee IDs.

When you are done, click on the SAP Sales Cloud ribbon and select the Save data to button in the Workbook menu. The data will now be loaded into the SAP Sales Cloud and you will receive a message.

2.3.2. Territory Team

You can also use the Microsoft Excel® Add In to initially upload the sales team of a territory. Click on Upload Territory Team and then again on Upload Territory Team. When you click on the button once again a popup will appear, so that you have to select the language for the template. Note that when you use this function instead of Delta Upload all entries under the Tab of Sales Team will be deleted before your new Roles will be uploaded to this specific Territories you want to adjust.

In the example below, a sales team is uploaded for the Territory ID 776. The Party Roles Manager (ZTERPMAN), Inside Sales Manager (ZTERPISM) and Outside Sales Manager (ZTERPOSM) are assigned. In the columns Start Date and End Date you have the possibility to limit the role in time, for example if you know that a colleague has to substitute someone for two years only. Confirm your entry in the template with Save data to.

When the change is deposited in the system, all previous entries for Territory 776 have been removed and you will only find the three entries on the template in the Tab of Territory Team. In all other Territories you will still find all entries, since you have only selected one Territory in this template. The next figure shows the result of your upload for Territory ID 776, which is Alabama – East.

With the Delta Upload function, the template looks slightly different. Here you have the possibility to differentiate between 1 – Create and 2- Delete under the Action column. Note here that all roles already entered for this Territory will remain and you can only add new ones (1 – Create) or delete existing ones (2 – Delete).

2.3.3. Account Mapping

Generally, with the Account Mapping you have the possibility to assign accounts to a territory, which is normally controlled by the Realignment Rules. In Account Mapping you can separate two functions: Upload Account Territory Mapping and Delta Upload. In the Upload Account Territory Mapping function, the template is very simple – consisting of the two columns Territory ID and Account ID. Note that when you use this function only new entries will be added and none of the existing entries will be changed.

You can check your entries in the Tab of Accounts in the Territory:

Before:

After:

Also with this delta upload you have the possibility to separate between 1 – Create and 2 – Delete via the Action column.

Do you need consulting from our experts?

The Customer Experience team at Camelot ITLab deals with exciting and challenging CRM related topics every day and serves a large portfolio of different customers from a wide range of industries. Trust in this collaboration and feel free to contact us at tlil@camelot-itlab.com.

Was this article helpful?

If you like our content we would highly appreciate your review on Trustpilot


#SAP C4C #SAP Cloud 4 Customer #Cloud 4 Customer #Cloud for Customer #SAP Sales Cloud #Sales Cloud #Territory Management #AccountMapping #Sales Territory Team #Delta Upload #

Receive the latest news

Subscribe To our SAP Sales & Service Cloud Newsletter

Get notified about new articles